Instant Connection for Pixel Streaming
— New Feature Automated Setup

How to Run Blender on a Cloud GPU (Ubuntu): The Complete 2026 Guide
How to Run Blender on a Cloud GPU (Ubuntu): The Complete 2026 Guide
How to Run Blender on a Cloud GPU (Ubuntu): The Complete 2026 Guide
Table of Contents
Quick answer: To run Blender on a cloud GPU, launch a GPU Ubuntu desktop (for example on Vagon with an NVIDIA A10G), install Blender, enable the GPU under Cycles render devices, and render as usual, or batch-render from the command line. Because drivers and CUDA are preconfigured, Cycles renders far faster than on a laptop, your own machine stays free, and you only pay for the hours the GPU runs.
Key takeaways
A cloud GPU renders Cycles scenes far faster than a laptop, turning hour-long renders into a fraction of the time.
Your local machine stays free while renders run in the cloud, and jobs keep going in the background.
Drivers, CUDA, and OptiX support are preconfigured, so the GPU appears in Blender's preferences and just works.
Command-line rendering lets you queue big jobs and animations headlessly and free up the interface.
It's billed by the minute, ideal for render bursts and a poor fit for constant all-day rendering, where owning a GPU may win.
Linux is a first-class home for Blender, which is why many studios render on it.
Blender doesn't care how much you love your laptop. Fire up a Cycles render at 4K with a few bounces and some volumetrics, and even a decent machine will sit there for an hour making fan noise. Meanwhile you can't use your computer for anything else, because Blender has claimed the GPU and the room is getting warm.
There's a cleaner way to do this. Run Blender on a cloud GPU Ubuntu desktop. You get a real NVIDIA card in a data center, your renders finish faster, and your own laptop stays cool and free while it happens. When the job's done, you shut the machine off and stop paying.
This guide covers why a cloud GPU is such a good fit for Blender, the technical choices that affect render speed, exactly how to set it up, how to render animations and batch jobs efficiently, and the honest trade-offs so you know precisely what you're getting.
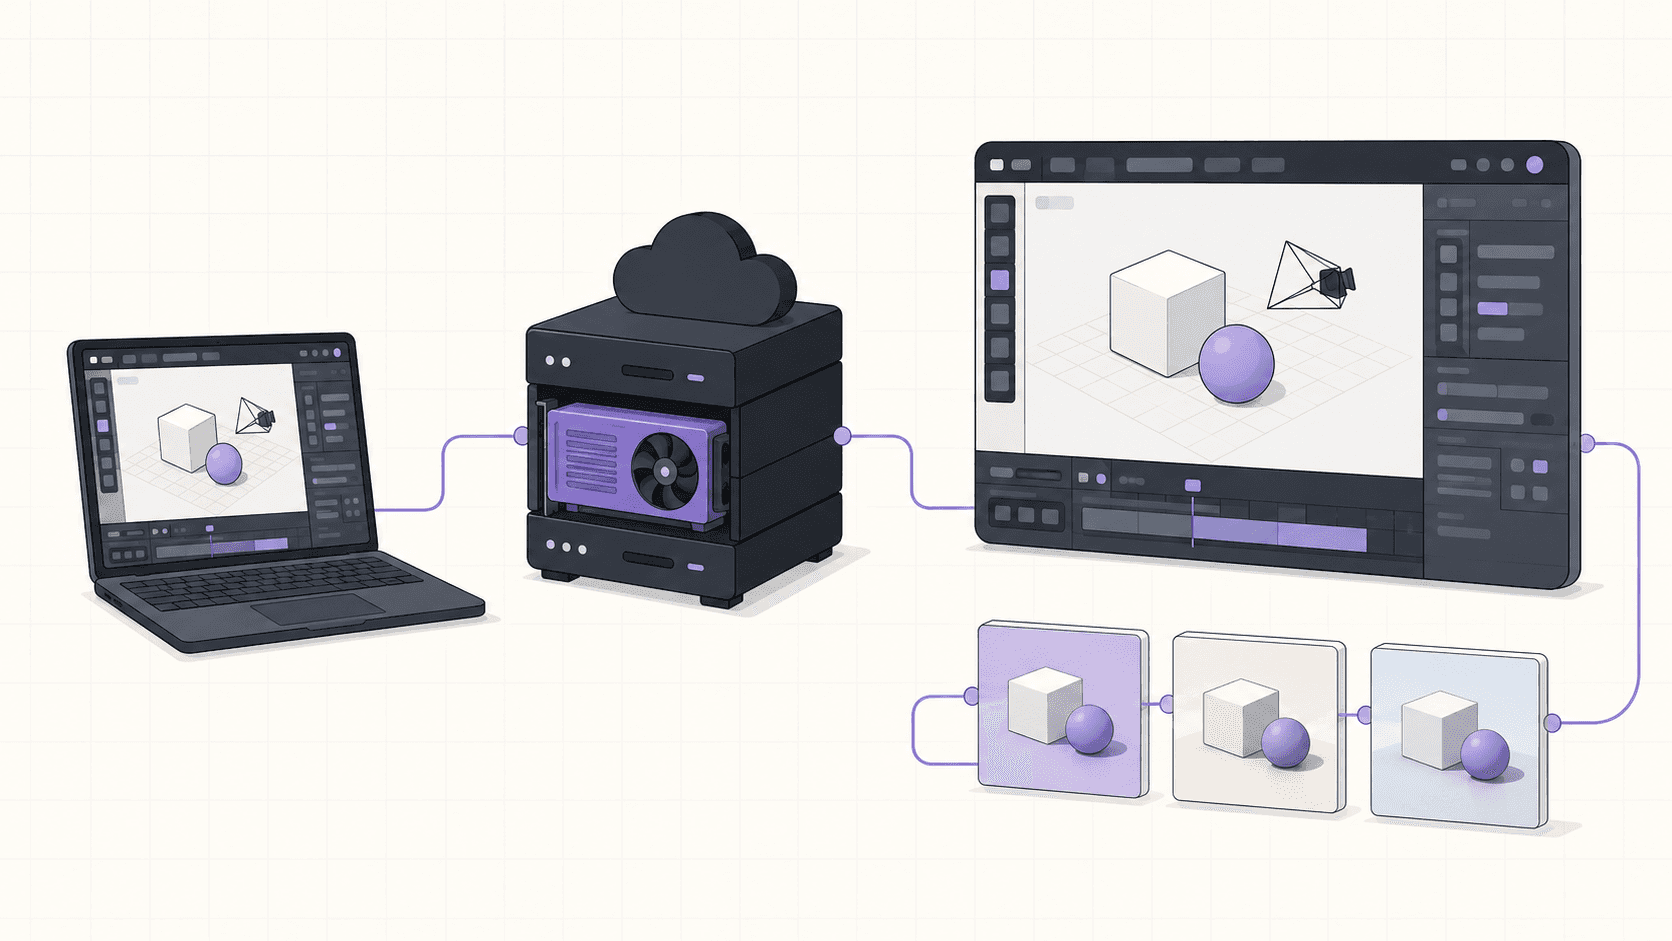
Why run Blender on a cloud GPU
Let's be specific about the wins, because "it's faster" is too vague to plan around.
#1. Your renders finish faster
A data-center GPU like an NVIDIA A10G renders Cycles scenes considerably faster than a laptop GPU or an integrated chip. For heavy scenes, that's the difference between waiting an hour and waiting a fraction of it. If you iterate a lot, tweaking lighting, materials, and camera angles and re-rendering to check, that saved time comes straight back to you and changes how freely you can experiment.
#2. Your own machine stays usable
This is underrated. When Blender renders locally, your computer is basically out of commission, the fans roar and everything else slows to a crawl. Offload the render to a cloud machine and you can keep working, browsing, or editing on your laptop while the render churns somewhere else. You can even close the tab and let it run in the background, then come back to finished frames.
#3. You only pay when you're rendering
A GPU workstation is expensive to buy and mostly idle. Renting a cloud GPU by the minute means you pay for the render time and nothing else. For anyone who renders in bursts, on a project here and a job there, that shape is far more sensible than owning hardware that naps most of the week.
#4. No driver headaches
Getting GPU rendering working on a fresh Linux install can mean wrestling with NVIDIA drivers and CUDA or OptiX support. On a cloud GPU desktop, that's already done. Open Blender, pick your GPU in preferences, and render. The whole "why won't my GPU show up in Cycles" ordeal simply doesn't happen.
#5. You can scale up for one big project
Sometimes a single project needs far more machine than you own, a huge scene, a long animation, a tight deadline. Instead of upgrading your whole setup for one job, rent a powerful GPU for the duration and give it back when you're done.
If you’re looking for a full Linux environment without setting up local hardware, this guide explains how to get an Ubuntu desktop in the cloud.
Why Ubuntu is a great home for Blender
Blender runs beautifully on Linux, and this isn't a compromise, it's how a lot of professionals prefer to render. Many studios render on Linux, and for good reasons. It's stable, it's lean, and it doesn't spend your GPU memory and system resources on a heavy operating system, which means more of the machine is available for the actual render. Cycles with CUDA and OptiX runs great on NVIDIA cards under Ubuntu, and the command-line render tools make batch and headless rendering straightforward when you want them.
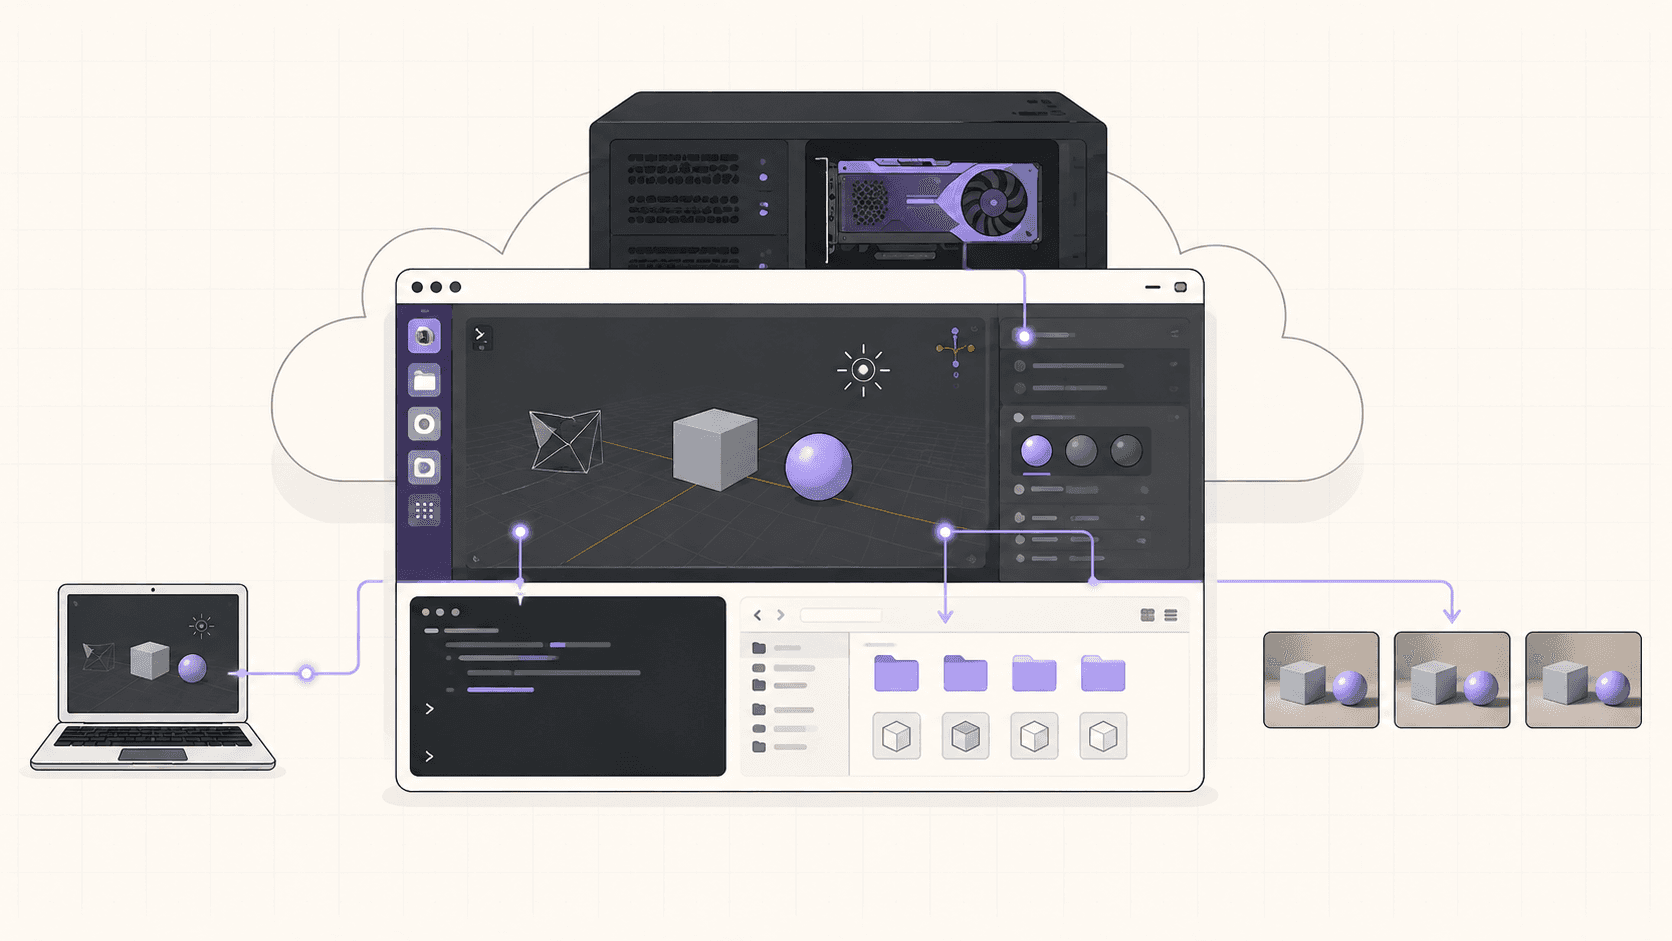
On a cloud desktop you get the best of both worlds. A full Ubuntu GNOME desktop where you can open Blender's interface, tweak your scene, adjust materials, and hit render exactly like normal, plus the option to drop to the terminal and batch-render from the command line when you want to automate a big job. You're never forced into a headless-only workflow, but you have the power of one available whenever it helps.
CUDA vs OptiX, and Cycles vs Eevee
Two technical choices have a real impact on your experience, so they're worth understanding.
CUDA vs OptiX
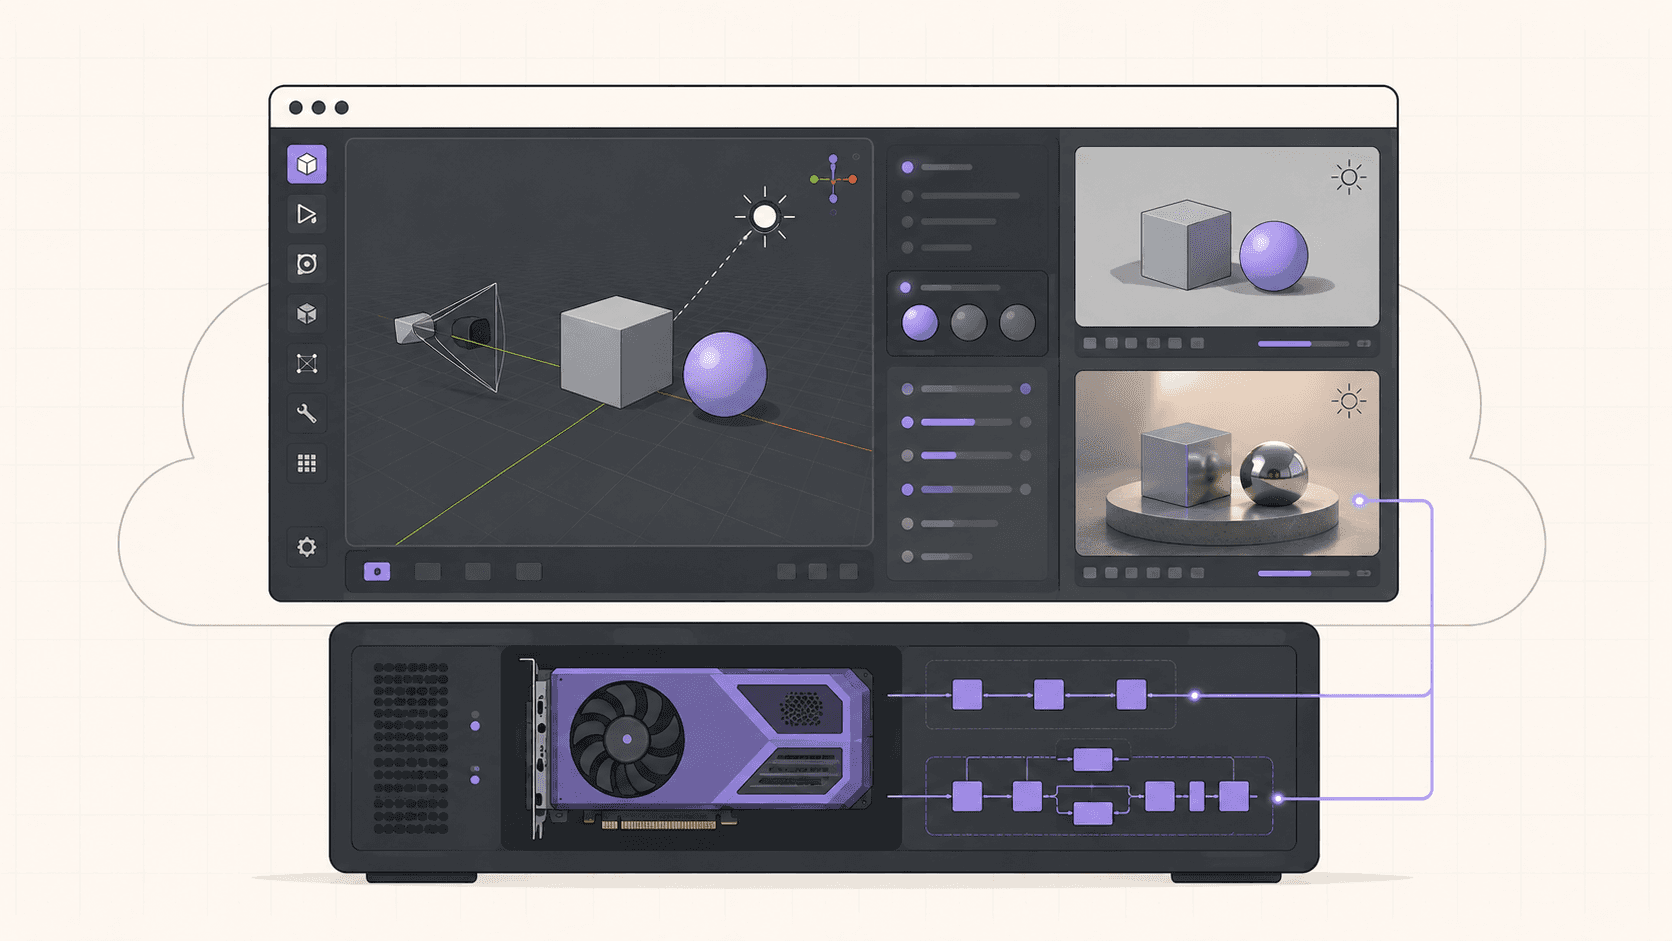
Cycles, Blender's physically-based path tracer, can use NVIDIA GPUs through two backends. CUDA is the general compute path and works across NVIDIA cards. OptiX takes advantage of the RTX ray-tracing hardware and is generally faster on cards that support it, which the modern data-center GPUs do. The practical advice is simple: try both in your actual scene and use whichever renders faster, which on RTX-class hardware is usually OptiX. On a cloud GPU desktop, both are available in Blender's preferences because the drivers are already set up.
Cycles vs Eevee
Blender has two main render engines, and they serve different purposes. Cycles is the physically-based path tracer that produces photorealistic results by simulating how light actually behaves. It's the render-time-heavy engine, and it's exactly where a fast cloud GPU pays off most. Eevee is a real-time rasterization engine that's dramatically faster and great for stylized work, previews, and projects where perfect physical accuracy isn't the goal. Both use the GPU. If your work is photorealistic Cycles rendering, the cloud GPU is transformative. If you live mostly in Eevee, you still benefit from a strong GPU, just less dramatically.
Understanding which engine your project uses tells you how much a cloud GPU will help, and how much horsepower you should rent.
When a cloud GPU desktop is the right call
You render scenes heavy enough that your local machine struggles or ties itself up for hours.
You render in bursts and don't want to buy a GPU that mostly sits idle.
You're on a Mac or a laptop without a strong NVIDIA GPU and want fast Cycles rendering.
You want to keep working on your own machine while renders run elsewhere.
You occasionally need far more power than usual for one big project or a deadline.
When to skip it
A cloud GPU desktop is billed by the minute at workstation rates. If you render constantly, all day every day as your full-time job, at some point owning a GPU or renting a dedicated monthly machine works out cheaper than per-minute billing. And if your scenes are light and your current machine renders them in a couple of minutes, you may not need the cloud at all.
The cloud wins clearly for bursts and for jobs bigger than your hardware. Spin it up for the heavy render, and shut it down after. For a professional rendering nonstop, dedicated infrastructure eventually makes more sense, and that's worth being honest about.
If you’re working from a tablet, you can learn how to run Ubuntu on an iPad and access a complete Linux desktop remotely.
What you'll need
A Vagon account with a payment method.
A GPU plan with an NVIDIA card. For serious Cycles rendering, an A10G is a strong choice. For lighter work or Eevee, a smaller GPU plan is fine.
Optionally, persistent storage if you want your project files, textures, and asset libraries to live on the machine between sessions.
Step 1: Launch a GPU Ubuntu machine
Create a computer on Vagon, choose Linux as the operating system, and pick a GPU plan. It boots in about 90 seconds. One nice detail: Linux plans cost a bit less than the Windows equivalents because there are no OS licensing fees to pass on, which matters when you're renting compute by the hour.
Step 2: Install Blender
You have options. The quickest is often the terminal:
Or grab the latest official build directly from blender.org, extract it, and run it. If Vagon's Ubuntu template already includes Blender preinstalled, even better, you can skip straight to opening it.
Step 3: Confirm the GPU is available in Blender
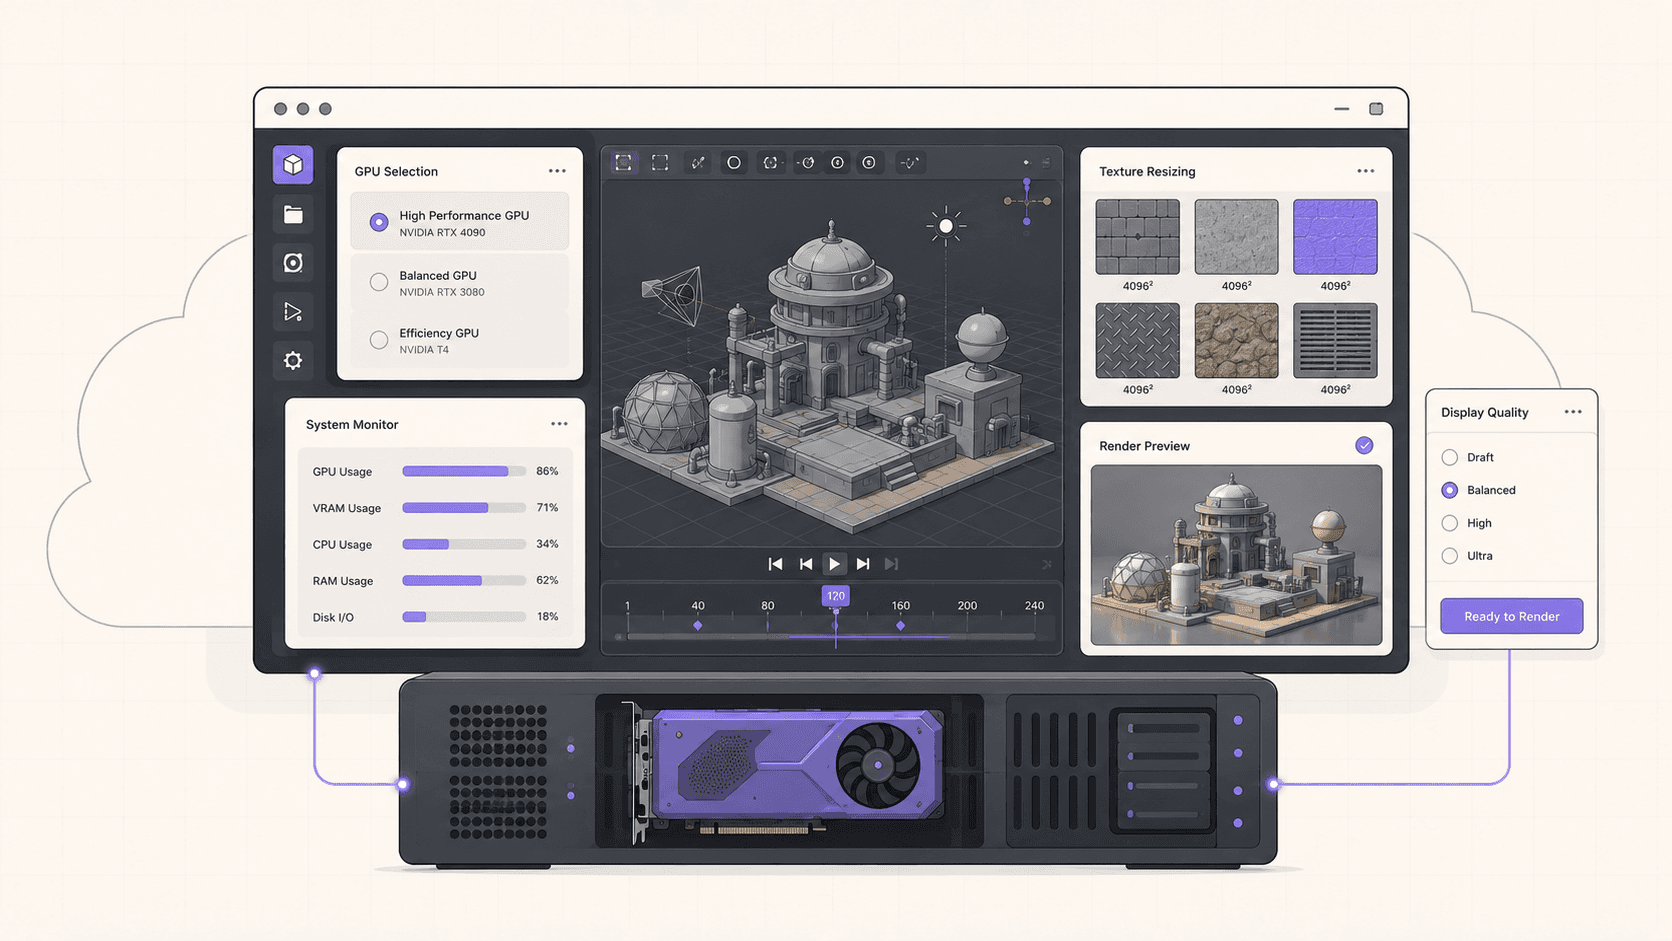
Open Blender, go to Edit, then Preferences, then System. Under the Cycles Render Devices you should see your NVIDIA GPU listed under CUDA or OptiX. Enable it. This is where the cloud desktop pays off, because the driver and CUDA are already there, so the GPU just shows up instead of forcing you into a troubleshooting session.
Step 4: Load your scene
Get your .blend file and assets onto the machine. On a desktop you can do this by downloading from cloud storage in the browser, cloning from a repo, or using the terminal with wget. If you're on persistent storage, your project library can just live there between sessions.
Step 5: Render
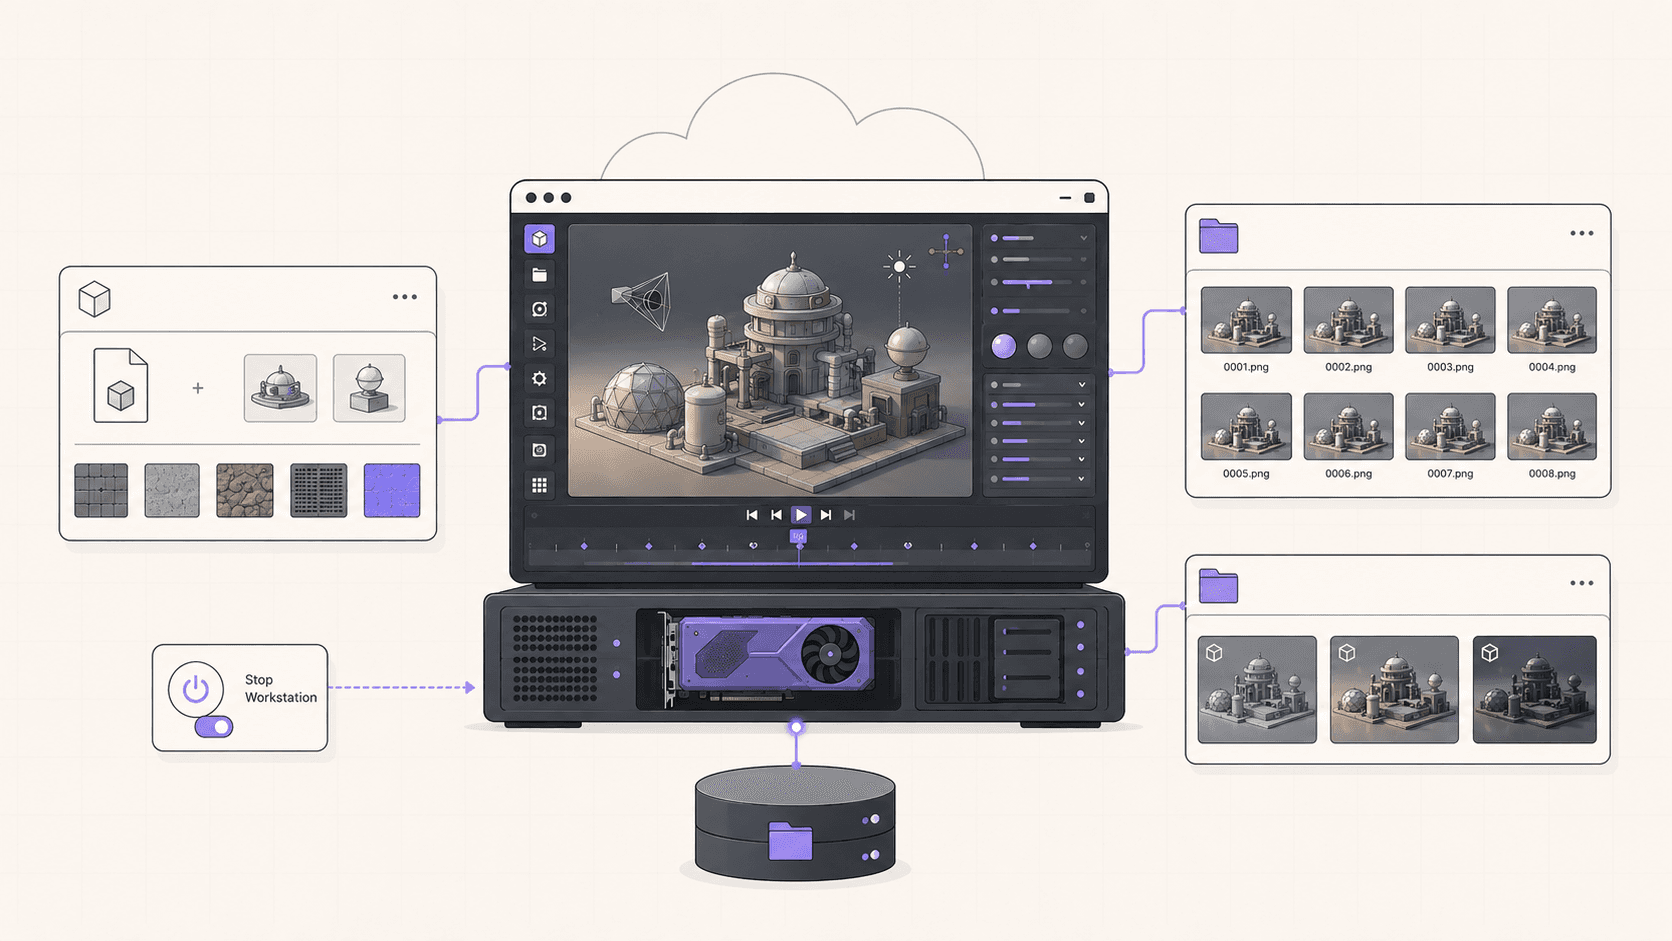
Set your render device to GPU Compute, pick OptiX or CUDA, and render like you always would. For big jobs, use the command line to render headless and free up the interface, which we'll cover next.
Step 6: Get your output back
When the render finishes, download the frames or the final image. If you're rendering a large animation with a lot of high-resolution frames, keep an eye on outbound data transfer, where the first 10GB a month is included. For stills and short clips you'll never notice.
Rendering from the command line
The interface is great for setting up a scene, but for heavy jobs, command-line rendering is the professional's tool, and it's a big reason Linux is favored for rendering.
To render a single frame headlessly:
Here -b runs Blender in the background with no interface, -o sets the output path with #### as a frame-number placeholder, and -f 1 renders frame 1. Running headless frees up the machine's resources for the render itself and lets you queue jobs without the interface in the way.
The advantage of this approach on a cloud desktop is that you can kick off a long render, close the tab, and let the machine keep working in the background. You're not tied to watching a progress bar. Come back later, and the frames are done. Combined with per-minute billing, the discipline is simple: start the job, let it run for exactly as long as it needs, and shut the machine down when it completes.
If you’re experimenting with private AI models, this guide walks through how to run Ollama in the cloud.
Rendering animations efficiently
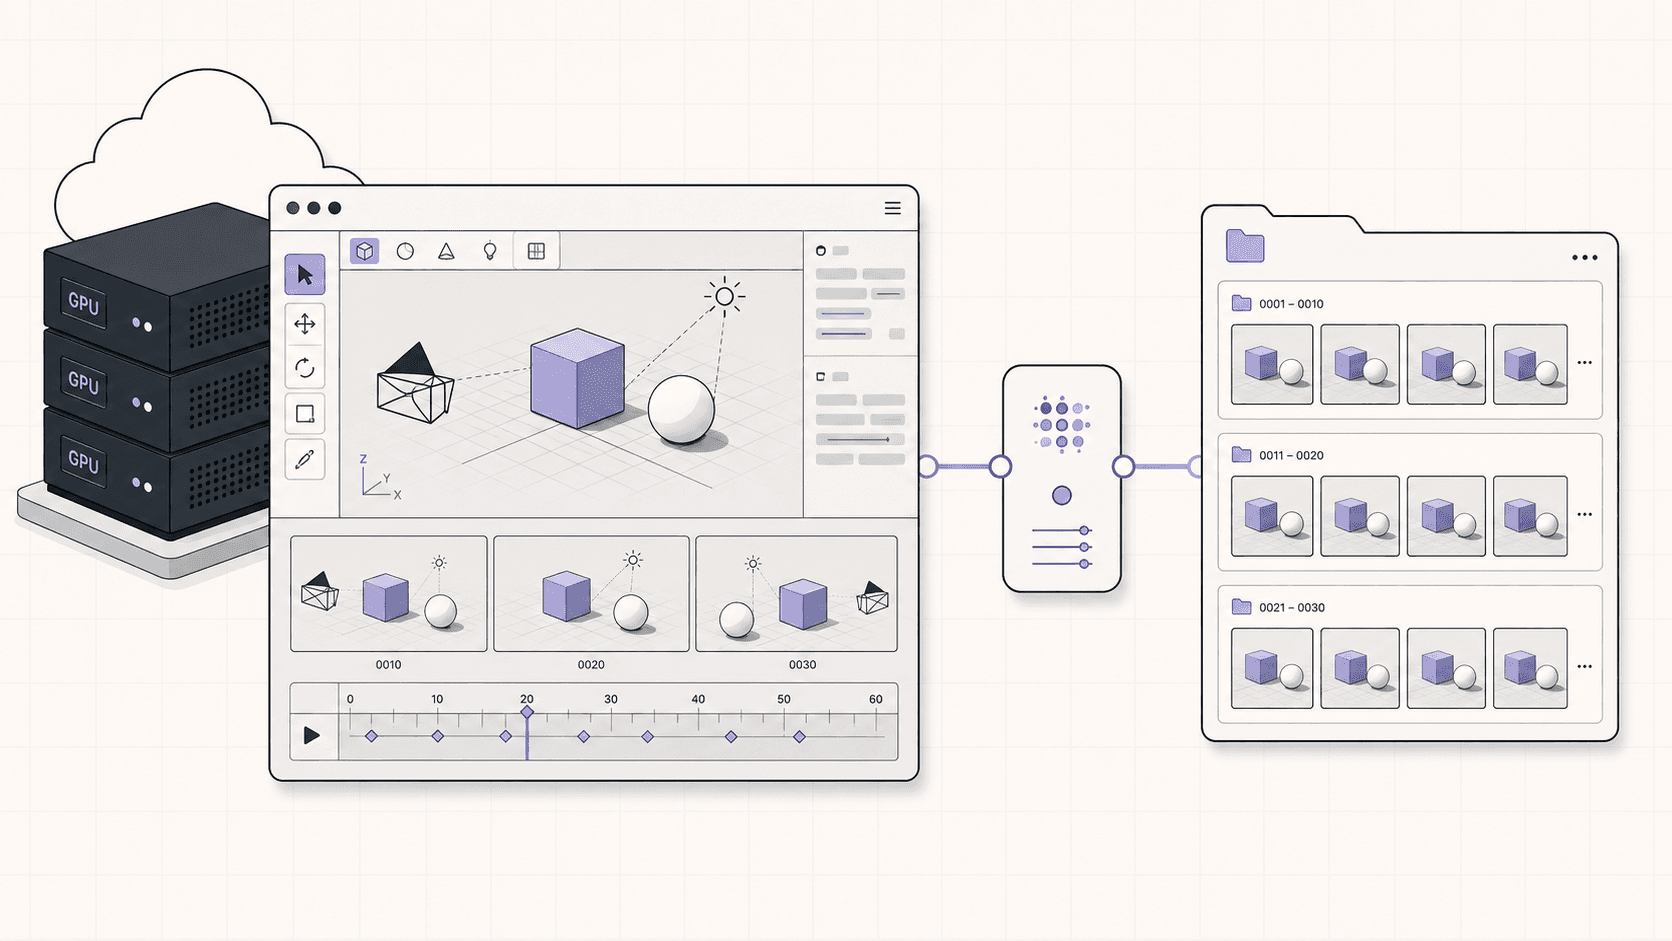
Animations are where cloud rendering really earns its place, because they multiply a single frame's render time by hundreds or thousands of frames.
To render a full animation from the command line, render the whole frame range:
The -a flag renders the animation's full frame range as set in the file. Each frame is written out as it completes, so even if something interrupts the job, you keep the frames already finished.
A few habits make animation rendering smoother:
Render to individual frames, not a single video file. Outputting a sequence of image frames means an interruption doesn't cost you the whole render, and you can assemble the video afterward. It also lets you re-render just a problem frame rather than the entire sequence.
Consider rendering in chunks. For very long animations, you can render frame ranges separately, which makes it easy to parallelize across sessions or recover from interruptions.
Watch your render time before committing. Render a few representative frames first to estimate the total, so you know roughly how long the machine needs to run and can plan the cost.
Denoise to cut sample counts. Cycles' denoising lets you get clean results with fewer samples, which can dramatically reduce render time per frame. For animation, that saving multiplies across every frame.
Choosing the right GPU
Matching the card to the work:
Work | Recommended GPU |
|---|---|
Eevee, lighter Cycles scenes | Smaller GPU plan |
Standard Cycles stills | A10G |
Heavy Cycles scenes, volumetrics, high samples | A10G or higher |
Long or high-resolution animations | Higher GPU plans, or render in chunks |
The general rule: more GPU power means faster renders and the ability to handle heavier scenes without running low on memory. If your scenes are complex or your deadlines tight, step up. If they're modest, a smaller plan renders them fine.
Getting your files in and out
A real project has assets going in and renders coming out, and a full desktop gives you flexible options.
Getting your scene and assets onto the machine can be done through the browser by downloading from cloud storage, through Git for versioned projects, or via the terminal with wget and curl. For large asset libraries you reuse across projects, persistent storage is the clean answer, so your textures, HDRIs, and reusable models simply live on the machine.
Getting renders back off is the reverse: download finished frames through the browser or file manager, or push them to cloud storage with a CLI. For large animation outputs, keep an eye on outbound transfer beyond the included 10GB per month. A common workflow is to render to a sequence, then either assemble the video on the machine before downloading a single smaller file, or sync the frames to your own storage in bulk.
Beyond rendering: simulations and heavy add-ons
Rendering is the obvious win, but it's not the only reason a powerful cloud machine helps a Blender artist.
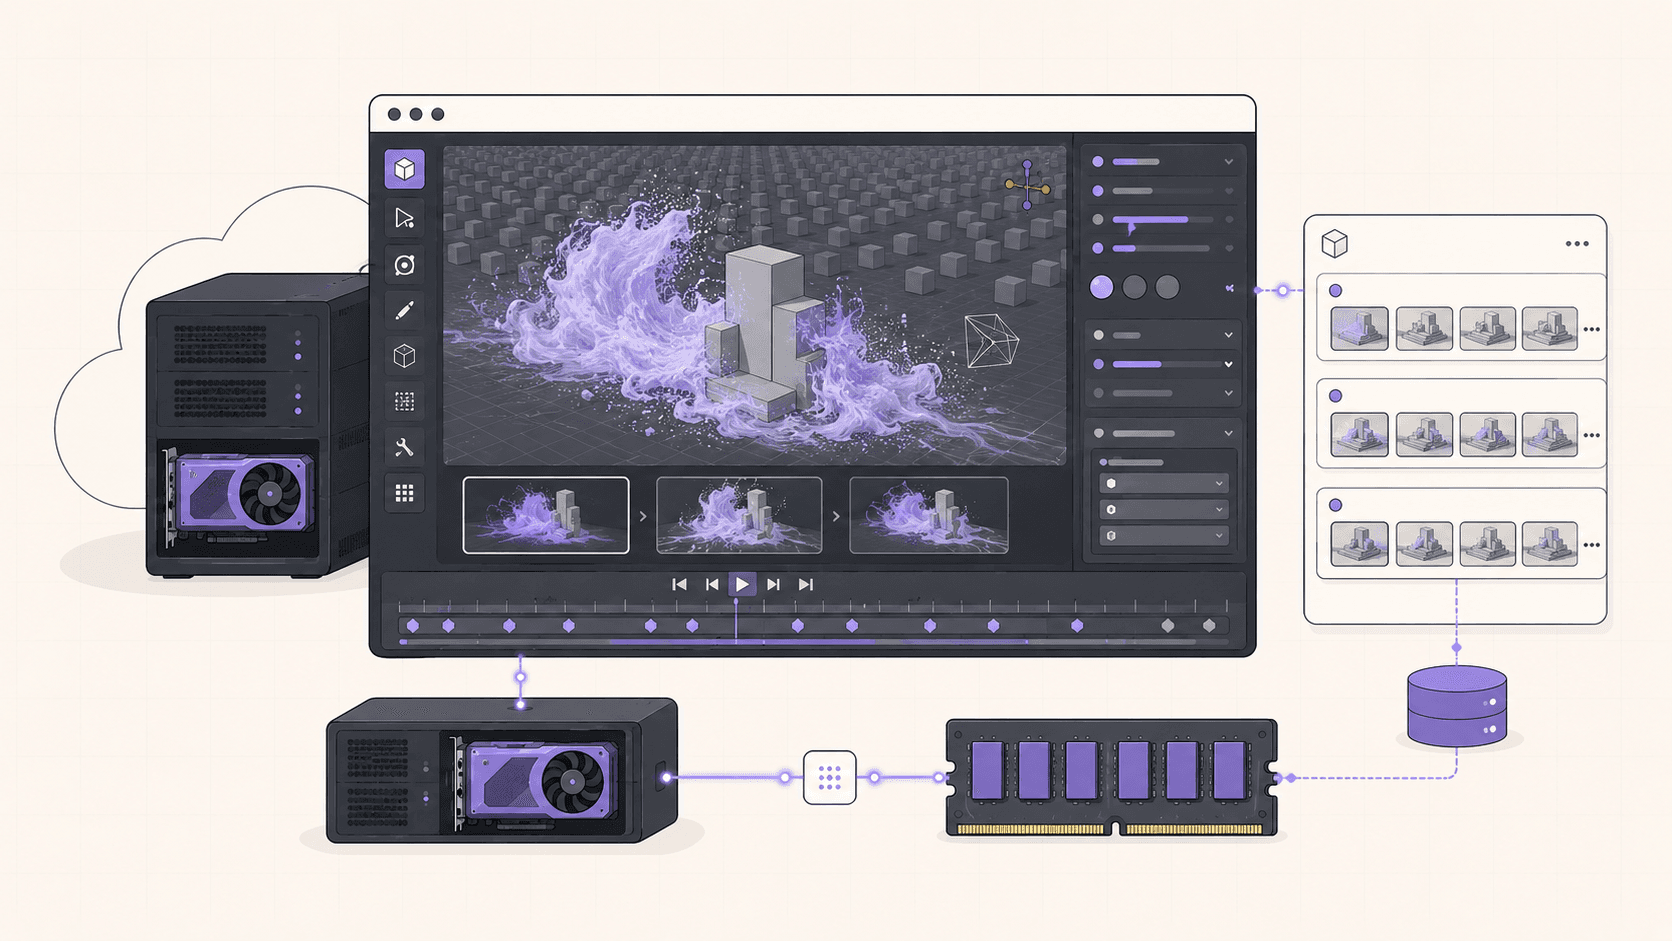
Physics simulations are some of the most demanding work in Blender. Fluid, smoke, cloth, and particle simulations have to be baked, a compute-heavy process that can take a long time and use a lot of memory on a complex setup. A more powerful machine bakes these faster and handles higher-resolution simulations that a modest laptop would struggle with. If you've ever waited ages for a fluid sim to bake, or hit a memory ceiling on a smoke simulation, a beefier cloud machine directly addresses that.
Heavy add-ons and geometry-dense scenes benefit too. Scattering millions of instances for a forest, working with high-poly sculpts, or running procedural generation add-ons all lean on system resources. A cloud machine with plenty of memory and a strong GPU gives these room to work.
The broader point is that a cloud desktop isn't only a render farm you visit at the end of a project. It's a full Blender workstation you can use for the whole heavy part of a project, simulating, sculpting, scattering, and rendering, whenever your own machine isn't up to the task, and then step away from when you're back to lighter work.
Tips to speed up your Cycles renders
Getting the most out of your rented GPU time comes down to a handful of well-known techniques:
Use denoising. Cycles' denoiser lets you reach a clean image with far fewer samples than you'd otherwise need. Since render time scales with samples, this is often the single biggest time saver, and it multiplies across every frame of an animation.
Set samples sensibly. More samples reduce noise but cost time. Find the lowest sample count that looks clean for your scene, especially with denoising on, rather than defaulting to a high number out of habit.
Use adaptive sampling. Letting Cycles spend samples where they're needed and stop early where the image has already converged saves time without visible quality loss.
Optimize light paths. Reducing the maximum number of bounces where your scene doesn't need them cuts render time. Interior scenes with lots of glass and reflection need more; simple scenes need fewer.
Keep textures reasonable. Enormous textures eat memory and can slow things down. Use resolutions appropriate to how large each object appears in frame.
Pick OptiX on RTX hardware. As covered earlier, OptiX usually beats CUDA on modern cards, so it's worth confirming which is faster for your scene.
These optimizations matter more when you're paying by the minute, because every minute of render time you save is money kept. A little tuning before a big animation render can meaningfully reduce both your wait and your bill.
If you’re building node-based image generation workflows, here’s how to run ComfyUI in the cloud with access to more powerful GPUs.
Real-world use cases
The freelance 3D artist on a deadline. A client render is due, and your laptop would take all night. Rent an A10G, render the job in a fraction of the time, deliver, and shut down. You paid for a few hours, not a workstation.
The motion designer iterating on look. You're refining lighting and materials and need to re-render often to judge changes. A fast cloud GPU makes each iteration quick, so you actually explore instead of dreading every render.
The student learning Blender. You want to try Cycles and complex scenes but your machine is modest. A cloud GPU lets you work at a professional level without buying professional hardware.
The Mac-based artist. Your machine lacks a strong NVIDIA GPU for Cycles. A cloud GPU desktop gives you the CUDA and OptiX rendering that Cycles performs best with.
The occasional big project. Most of your work is light, but once in a while a project needs serious power, a huge scene or a long animation. Rent the horsepower for that project and give it back afterward.
Common mistakes to avoid
Leaving the machine running after the render finished. The number one cost mistake. A headless render can finish while you're away, so build the habit of checking and shutting down.
Rendering animations to a single video file. If it's interrupted, you can lose everything. Render to an image sequence and assemble the video afterward.
Skipping persistent storage, then re-uploading assets every session. If you render regularly, keep your asset library on persistent storage.
Not estimating render time first. Render a few frames to gauge the total before committing to a long job, so the cost and duration don't surprise you.
Forgetting to pack or relink assets. A
.blendwith missing textures renders wrong. Use relative paths or pack your assets so they travel with the file.
Cost breakdown
Your cost is the machine's running time billed by the minute, plus optional persistent storage (about five dollars per 50GB per month) if you want your assets to persist, plus outbound transfer beyond the included 10GB per month, which mainly matters for large animation exports.
The honest framing: for render bursts, where you rent a powerful GPU for the hours a job takes and then stop, cloud rendering is efficient and avoids a large hardware purchase. For nonstop full-time rendering, owning a GPU or renting dedicated monthly infrastructure eventually costs less. The biggest cost mistake is forgetting a machine is still running after the render finished, so build the habit of shutting down when the job completes. Check the pricing page for current per-hour rates by GPU plan and region.
If you’re testing private or open-source AI models, you can also learn how to run a local LLM on Ubuntu in the cloud.
Cloud GPU desktop vs render farm vs buying a GPU
If you render heavy scenes, you've probably weighed these three options. Here's how they actually differ.
A render farm is a service you submit a job to, and it renders your frames across many machines and sends the results back. Farms are excellent for enormous animation jobs where you want massive parallelism and don't need to interact with the machine. The trade-offs are that you're working through a submission pipeline rather than a live Blender session, you have less direct control, and per-job costs can climb for big jobs.
Buying a GPU gives you unlimited local rendering with no per-hour cost, which is ideal if you render constantly. The trade-offs are a large upfront cost, a card that sits idle when you're not rendering, and eventual obsolescence as newer hardware arrives.
A cloud GPU desktop sits between these. You get a live, interactive Blender workstation, so you can set up your scene, tweak it, and render, all in one place, with the flexibility to render single stills, iterate on look, or batch an animation. You pay only for the hours you use, with no upfront hardware cost, and you can pick a bigger card for a demanding project. The trade-off versus a render farm is less raw parallelism for gigantic animation jobs, and the trade-off versus owning is a per-hour cost if you render nonstop.
The honest guidance: for interactive work, iteration, and moderate render jobs, a cloud GPU desktop is a superb fit. For truly massive animation renders where you just need frames back as fast as possible, a render farm may finish sooner. For constant full-time rendering, owning hardware eventually costs less. Many artists sensibly use a cloud desktop for day-to-day heavy work and reach for a farm only on the occasional giant job.
Troubleshooting
#1. The GPU doesn't appear in Blender's preferences
Make sure you launched a GPU plan. On a GPU plan the drivers are preconfigured, so the card should show under CUDA or OptiX in Preferences, then System. If it doesn't, restart the machine.
#2. The render is slow despite a GPU
Confirm the render device is set to GPU Compute, not CPU, and that OptiX or CUDA is selected. Also check the scene fits in GPU memory, since a scene that overflows will slow down.
#3. Out of memory on a complex scene
The scene needs more VRAM than the card has. Simplify where you can, reduce texture sizes, or step up to a higher GPU plan.
#4. The interface feels laggy while I work
That's your connection to the streamed desktop, not the render performance. Lower the stream resolution or move to a better network. The render itself runs at full GPU speed regardless.
Blender on Linux vs Windows: what actually changes
If you've only used Blender on Windows or Mac, running it on Ubuntu might sound like a big adjustment. In practice, it's a small one, and worth understanding since it removes the main hesitation people have about cloud rendering on Linux.
Blender itself is essentially identical across operating systems. The interface, the tools, the shortcuts, the render engines, the .blend file format, all the same. A scene you built on Windows opens and renders on Linux without conversion, and your muscle memory carries over completely. Blender is genuinely cross-platform, and the Linux version is a first-class citizen, not an afterthought.
The differences are around Blender rather than inside it. File paths look a little different, forward slashes instead of backslashes, though Blender handles this gracefully, especially with relative paths. Installing Blender uses Linux methods like a package manager or a downloaded build rather than an installer executable. And the surrounding tools, a file manager, a terminal, are Linux versions, though they do the same jobs. None of this touches how you actually model, light, or render.
For GPU rendering specifically, Linux is arguably the better environment, which is part of why studios use it. It's lean, stable, and doesn't spend resources on a heavy OS, leaving more of the machine for your render. On a cloud desktop, the one part that's usually painful on Linux, getting the NVIDIA drivers and CUDA or OptiX working, is already handled, so you skip straight to the part that's the same everywhere: opening Blender and rendering.
The honest bottom line is that if you can use Blender on Windows, you can use it on Ubuntu with almost no learning curve. Bring your .blend file and its assets, and you'll feel at home immediately, with the bonus of Linux's rendering efficiency and a preconfigured GPU.
If you want more visibility into what an autonomous workflow is doing, this guide shows how to watch your AI agent work on a cloud desktop.
The verdict
Blender and a cloud GPU are a natural fit. You get a fast NVIDIA card with drivers already working, a full Ubuntu desktop where the interface feels smooth, command-line rendering when you want to automate, and the flexibility to scale up for a big job and give the hardware back afterward. Your own machine stays free while renders run in the cloud, and you only pay for the time the GPU is actually working.
Stop tying up your laptop for an hour every render. Create a Vagon account, launch a GPU Ubuntu machine, and you'll be rendering in Cycles within a few minutes.
Frequently Asked Questions
Do I need to configure NVIDIA drivers and CUDA myself?
No. That's one of the best reasons to use a cloud GPU desktop for Blender. Drivers and CUDA are already set up, so your GPU appears in Blender's preferences and rendering works right away.
Can I use both Cycles and Eevee?
Yes. Eevee is fast and great for real-time and stylized work, Cycles is the physically-based path tracer for photorealism. Both run on the GPU. Cycles is where the cloud GPU really pays off, since it's the render-time-heavy engine.
Should I use CUDA or OptiX?
On RTX-class GPUs, OptiX is usually faster because it uses the ray-tracing hardware. Try both in your actual scene and use whichever renders quicker. Both are available on a cloud GPU desktop.
Will my project files be there next session?
Only if you add persistent storage. With it, your .blend files, textures, and asset libraries wait for you. Without it, treat each session as a fresh machine and bring your project along.
Is this good for animation, not just stills?
Yes, especially with command-line batch rendering. Queue the full frame range, let it render, and download the frames. For very large animations, factor in render time and outbound transfer, and consider rendering in chunks.
How much faster is a cloud GPU than my laptop?
It depends on your laptop and the scene, but a data-center GPU like an A10G renders Cycles scenes substantially faster than a typical laptop GPU, often turning an hour into a fraction of it. The heavier the scene, the bigger the difference.
Can I render on Linux if I built my scene on Windows or Mac?
Yes. Blender's .blend files are cross-platform, so a scene made on any OS renders on Linux. Just make sure your textures and linked assets come along, using relative paths or packing them into the file.
Does rendering in the cloud reduce quality?
No. It's the same Blender producing the same output. You're only changing where the render runs, not how it renders. A cloud GPU gives you identical quality, faster.
How do I keep the cost predictable?
Estimate render time from a few test frames, run in focused sessions, add persistent storage so setup is fast, and shut down when the render is done. The meter stops when the machine stops.
Quick answer: To run Blender on a cloud GPU, launch a GPU Ubuntu desktop (for example on Vagon with an NVIDIA A10G), install Blender, enable the GPU under Cycles render devices, and render as usual, or batch-render from the command line. Because drivers and CUDA are preconfigured, Cycles renders far faster than on a laptop, your own machine stays free, and you only pay for the hours the GPU runs.
Key takeaways
A cloud GPU renders Cycles scenes far faster than a laptop, turning hour-long renders into a fraction of the time.
Your local machine stays free while renders run in the cloud, and jobs keep going in the background.
Drivers, CUDA, and OptiX support are preconfigured, so the GPU appears in Blender's preferences and just works.
Command-line rendering lets you queue big jobs and animations headlessly and free up the interface.
It's billed by the minute, ideal for render bursts and a poor fit for constant all-day rendering, where owning a GPU may win.
Linux is a first-class home for Blender, which is why many studios render on it.
Blender doesn't care how much you love your laptop. Fire up a Cycles render at 4K with a few bounces and some volumetrics, and even a decent machine will sit there for an hour making fan noise. Meanwhile you can't use your computer for anything else, because Blender has claimed the GPU and the room is getting warm.
There's a cleaner way to do this. Run Blender on a cloud GPU Ubuntu desktop. You get a real NVIDIA card in a data center, your renders finish faster, and your own laptop stays cool and free while it happens. When the job's done, you shut the machine off and stop paying.
This guide covers why a cloud GPU is such a good fit for Blender, the technical choices that affect render speed, exactly how to set it up, how to render animations and batch jobs efficiently, and the honest trade-offs so you know precisely what you're getting.
Why run Blender on a cloud GPU
Let's be specific about the wins, because "it's faster" is too vague to plan around.
#1. Your renders finish faster
A data-center GPU like an NVIDIA A10G renders Cycles scenes considerably faster than a laptop GPU or an integrated chip. For heavy scenes, that's the difference between waiting an hour and waiting a fraction of it. If you iterate a lot, tweaking lighting, materials, and camera angles and re-rendering to check, that saved time comes straight back to you and changes how freely you can experiment.
#2. Your own machine stays usable
This is underrated. When Blender renders locally, your computer is basically out of commission, the fans roar and everything else slows to a crawl. Offload the render to a cloud machine and you can keep working, browsing, or editing on your laptop while the render churns somewhere else. You can even close the tab and let it run in the background, then come back to finished frames.
#3. You only pay when you're rendering
A GPU workstation is expensive to buy and mostly idle. Renting a cloud GPU by the minute means you pay for the render time and nothing else. For anyone who renders in bursts, on a project here and a job there, that shape is far more sensible than owning hardware that naps most of the week.
#4. No driver headaches
Getting GPU rendering working on a fresh Linux install can mean wrestling with NVIDIA drivers and CUDA or OptiX support. On a cloud GPU desktop, that's already done. Open Blender, pick your GPU in preferences, and render. The whole "why won't my GPU show up in Cycles" ordeal simply doesn't happen.
#5. You can scale up for one big project
Sometimes a single project needs far more machine than you own, a huge scene, a long animation, a tight deadline. Instead of upgrading your whole setup for one job, rent a powerful GPU for the duration and give it back when you're done.
If you’re looking for a full Linux environment without setting up local hardware, this guide explains how to get an Ubuntu desktop in the cloud.
Why Ubuntu is a great home for Blender
Blender runs beautifully on Linux, and this isn't a compromise, it's how a lot of professionals prefer to render. Many studios render on Linux, and for good reasons. It's stable, it's lean, and it doesn't spend your GPU memory and system resources on a heavy operating system, which means more of the machine is available for the actual render. Cycles with CUDA and OptiX runs great on NVIDIA cards under Ubuntu, and the command-line render tools make batch and headless rendering straightforward when you want them.
On a cloud desktop you get the best of both worlds. A full Ubuntu GNOME desktop where you can open Blender's interface, tweak your scene, adjust materials, and hit render exactly like normal, plus the option to drop to the terminal and batch-render from the command line when you want to automate a big job. You're never forced into a headless-only workflow, but you have the power of one available whenever it helps.
CUDA vs OptiX, and Cycles vs Eevee
Two technical choices have a real impact on your experience, so they're worth understanding.
CUDA vs OptiX
Cycles, Blender's physically-based path tracer, can use NVIDIA GPUs through two backends. CUDA is the general compute path and works across NVIDIA cards. OptiX takes advantage of the RTX ray-tracing hardware and is generally faster on cards that support it, which the modern data-center GPUs do. The practical advice is simple: try both in your actual scene and use whichever renders faster, which on RTX-class hardware is usually OptiX. On a cloud GPU desktop, both are available in Blender's preferences because the drivers are already set up.
Cycles vs Eevee
Blender has two main render engines, and they serve different purposes. Cycles is the physically-based path tracer that produces photorealistic results by simulating how light actually behaves. It's the render-time-heavy engine, and it's exactly where a fast cloud GPU pays off most. Eevee is a real-time rasterization engine that's dramatically faster and great for stylized work, previews, and projects where perfect physical accuracy isn't the goal. Both use the GPU. If your work is photorealistic Cycles rendering, the cloud GPU is transformative. If you live mostly in Eevee, you still benefit from a strong GPU, just less dramatically.
Understanding which engine your project uses tells you how much a cloud GPU will help, and how much horsepower you should rent.
When a cloud GPU desktop is the right call
You render scenes heavy enough that your local machine struggles or ties itself up for hours.
You render in bursts and don't want to buy a GPU that mostly sits idle.
You're on a Mac or a laptop without a strong NVIDIA GPU and want fast Cycles rendering.
You want to keep working on your own machine while renders run elsewhere.
You occasionally need far more power than usual for one big project or a deadline.
When to skip it
A cloud GPU desktop is billed by the minute at workstation rates. If you render constantly, all day every day as your full-time job, at some point owning a GPU or renting a dedicated monthly machine works out cheaper than per-minute billing. And if your scenes are light and your current machine renders them in a couple of minutes, you may not need the cloud at all.
The cloud wins clearly for bursts and for jobs bigger than your hardware. Spin it up for the heavy render, and shut it down after. For a professional rendering nonstop, dedicated infrastructure eventually makes more sense, and that's worth being honest about.
If you’re working from a tablet, you can learn how to run Ubuntu on an iPad and access a complete Linux desktop remotely.
What you'll need
A Vagon account with a payment method.
A GPU plan with an NVIDIA card. For serious Cycles rendering, an A10G is a strong choice. For lighter work or Eevee, a smaller GPU plan is fine.
Optionally, persistent storage if you want your project files, textures, and asset libraries to live on the machine between sessions.
Step 1: Launch a GPU Ubuntu machine
Create a computer on Vagon, choose Linux as the operating system, and pick a GPU plan. It boots in about 90 seconds. One nice detail: Linux plans cost a bit less than the Windows equivalents because there are no OS licensing fees to pass on, which matters when you're renting compute by the hour.
Step 2: Install Blender
You have options. The quickest is often the terminal:
Or grab the latest official build directly from blender.org, extract it, and run it. If Vagon's Ubuntu template already includes Blender preinstalled, even better, you can skip straight to opening it.
Step 3: Confirm the GPU is available in Blender
Open Blender, go to Edit, then Preferences, then System. Under the Cycles Render Devices you should see your NVIDIA GPU listed under CUDA or OptiX. Enable it. This is where the cloud desktop pays off, because the driver and CUDA are already there, so the GPU just shows up instead of forcing you into a troubleshooting session.
Step 4: Load your scene
Get your .blend file and assets onto the machine. On a desktop you can do this by downloading from cloud storage in the browser, cloning from a repo, or using the terminal with wget. If you're on persistent storage, your project library can just live there between sessions.
Step 5: Render
Set your render device to GPU Compute, pick OptiX or CUDA, and render like you always would. For big jobs, use the command line to render headless and free up the interface, which we'll cover next.
Step 6: Get your output back
When the render finishes, download the frames or the final image. If you're rendering a large animation with a lot of high-resolution frames, keep an eye on outbound data transfer, where the first 10GB a month is included. For stills and short clips you'll never notice.
Rendering from the command line
The interface is great for setting up a scene, but for heavy jobs, command-line rendering is the professional's tool, and it's a big reason Linux is favored for rendering.
To render a single frame headlessly:
Here -b runs Blender in the background with no interface, -o sets the output path with #### as a frame-number placeholder, and -f 1 renders frame 1. Running headless frees up the machine's resources for the render itself and lets you queue jobs without the interface in the way.
The advantage of this approach on a cloud desktop is that you can kick off a long render, close the tab, and let the machine keep working in the background. You're not tied to watching a progress bar. Come back later, and the frames are done. Combined with per-minute billing, the discipline is simple: start the job, let it run for exactly as long as it needs, and shut the machine down when it completes.
If you’re experimenting with private AI models, this guide walks through how to run Ollama in the cloud.
Rendering animations efficiently
Animations are where cloud rendering really earns its place, because they multiply a single frame's render time by hundreds or thousands of frames.
To render a full animation from the command line, render the whole frame range:
The -a flag renders the animation's full frame range as set in the file. Each frame is written out as it completes, so even if something interrupts the job, you keep the frames already finished.
A few habits make animation rendering smoother:
Render to individual frames, not a single video file. Outputting a sequence of image frames means an interruption doesn't cost you the whole render, and you can assemble the video afterward. It also lets you re-render just a problem frame rather than the entire sequence.
Consider rendering in chunks. For very long animations, you can render frame ranges separately, which makes it easy to parallelize across sessions or recover from interruptions.
Watch your render time before committing. Render a few representative frames first to estimate the total, so you know roughly how long the machine needs to run and can plan the cost.
Denoise to cut sample counts. Cycles' denoising lets you get clean results with fewer samples, which can dramatically reduce render time per frame. For animation, that saving multiplies across every frame.
Choosing the right GPU
Matching the card to the work:
Work | Recommended GPU |
|---|---|
Eevee, lighter Cycles scenes | Smaller GPU plan |
Standard Cycles stills | A10G |
Heavy Cycles scenes, volumetrics, high samples | A10G or higher |
Long or high-resolution animations | Higher GPU plans, or render in chunks |
The general rule: more GPU power means faster renders and the ability to handle heavier scenes without running low on memory. If your scenes are complex or your deadlines tight, step up. If they're modest, a smaller plan renders them fine.
Getting your files in and out
A real project has assets going in and renders coming out, and a full desktop gives you flexible options.
Getting your scene and assets onto the machine can be done through the browser by downloading from cloud storage, through Git for versioned projects, or via the terminal with wget and curl. For large asset libraries you reuse across projects, persistent storage is the clean answer, so your textures, HDRIs, and reusable models simply live on the machine.
Getting renders back off is the reverse: download finished frames through the browser or file manager, or push them to cloud storage with a CLI. For large animation outputs, keep an eye on outbound transfer beyond the included 10GB per month. A common workflow is to render to a sequence, then either assemble the video on the machine before downloading a single smaller file, or sync the frames to your own storage in bulk.
Beyond rendering: simulations and heavy add-ons
Rendering is the obvious win, but it's not the only reason a powerful cloud machine helps a Blender artist.
Physics simulations are some of the most demanding work in Blender. Fluid, smoke, cloth, and particle simulations have to be baked, a compute-heavy process that can take a long time and use a lot of memory on a complex setup. A more powerful machine bakes these faster and handles higher-resolution simulations that a modest laptop would struggle with. If you've ever waited ages for a fluid sim to bake, or hit a memory ceiling on a smoke simulation, a beefier cloud machine directly addresses that.
Heavy add-ons and geometry-dense scenes benefit too. Scattering millions of instances for a forest, working with high-poly sculpts, or running procedural generation add-ons all lean on system resources. A cloud machine with plenty of memory and a strong GPU gives these room to work.
The broader point is that a cloud desktop isn't only a render farm you visit at the end of a project. It's a full Blender workstation you can use for the whole heavy part of a project, simulating, sculpting, scattering, and rendering, whenever your own machine isn't up to the task, and then step away from when you're back to lighter work.
Tips to speed up your Cycles renders
Getting the most out of your rented GPU time comes down to a handful of well-known techniques:
Use denoising. Cycles' denoiser lets you reach a clean image with far fewer samples than you'd otherwise need. Since render time scales with samples, this is often the single biggest time saver, and it multiplies across every frame of an animation.
Set samples sensibly. More samples reduce noise but cost time. Find the lowest sample count that looks clean for your scene, especially with denoising on, rather than defaulting to a high number out of habit.
Use adaptive sampling. Letting Cycles spend samples where they're needed and stop early where the image has already converged saves time without visible quality loss.
Optimize light paths. Reducing the maximum number of bounces where your scene doesn't need them cuts render time. Interior scenes with lots of glass and reflection need more; simple scenes need fewer.
Keep textures reasonable. Enormous textures eat memory and can slow things down. Use resolutions appropriate to how large each object appears in frame.
Pick OptiX on RTX hardware. As covered earlier, OptiX usually beats CUDA on modern cards, so it's worth confirming which is faster for your scene.
These optimizations matter more when you're paying by the minute, because every minute of render time you save is money kept. A little tuning before a big animation render can meaningfully reduce both your wait and your bill.
If you’re building node-based image generation workflows, here’s how to run ComfyUI in the cloud with access to more powerful GPUs.
Real-world use cases
The freelance 3D artist on a deadline. A client render is due, and your laptop would take all night. Rent an A10G, render the job in a fraction of the time, deliver, and shut down. You paid for a few hours, not a workstation.
The motion designer iterating on look. You're refining lighting and materials and need to re-render often to judge changes. A fast cloud GPU makes each iteration quick, so you actually explore instead of dreading every render.
The student learning Blender. You want to try Cycles and complex scenes but your machine is modest. A cloud GPU lets you work at a professional level without buying professional hardware.
The Mac-based artist. Your machine lacks a strong NVIDIA GPU for Cycles. A cloud GPU desktop gives you the CUDA and OptiX rendering that Cycles performs best with.
The occasional big project. Most of your work is light, but once in a while a project needs serious power, a huge scene or a long animation. Rent the horsepower for that project and give it back afterward.
Common mistakes to avoid
Leaving the machine running after the render finished. The number one cost mistake. A headless render can finish while you're away, so build the habit of checking and shutting down.
Rendering animations to a single video file. If it's interrupted, you can lose everything. Render to an image sequence and assemble the video afterward.
Skipping persistent storage, then re-uploading assets every session. If you render regularly, keep your asset library on persistent storage.
Not estimating render time first. Render a few frames to gauge the total before committing to a long job, so the cost and duration don't surprise you.
Forgetting to pack or relink assets. A
.blendwith missing textures renders wrong. Use relative paths or pack your assets so they travel with the file.
Cost breakdown
Your cost is the machine's running time billed by the minute, plus optional persistent storage (about five dollars per 50GB per month) if you want your assets to persist, plus outbound transfer beyond the included 10GB per month, which mainly matters for large animation exports.
The honest framing: for render bursts, where you rent a powerful GPU for the hours a job takes and then stop, cloud rendering is efficient and avoids a large hardware purchase. For nonstop full-time rendering, owning a GPU or renting dedicated monthly infrastructure eventually costs less. The biggest cost mistake is forgetting a machine is still running after the render finished, so build the habit of shutting down when the job completes. Check the pricing page for current per-hour rates by GPU plan and region.
If you’re testing private or open-source AI models, you can also learn how to run a local LLM on Ubuntu in the cloud.
Cloud GPU desktop vs render farm vs buying a GPU
If you render heavy scenes, you've probably weighed these three options. Here's how they actually differ.
A render farm is a service you submit a job to, and it renders your frames across many machines and sends the results back. Farms are excellent for enormous animation jobs where you want massive parallelism and don't need to interact with the machine. The trade-offs are that you're working through a submission pipeline rather than a live Blender session, you have less direct control, and per-job costs can climb for big jobs.
Buying a GPU gives you unlimited local rendering with no per-hour cost, which is ideal if you render constantly. The trade-offs are a large upfront cost, a card that sits idle when you're not rendering, and eventual obsolescence as newer hardware arrives.
A cloud GPU desktop sits between these. You get a live, interactive Blender workstation, so you can set up your scene, tweak it, and render, all in one place, with the flexibility to render single stills, iterate on look, or batch an animation. You pay only for the hours you use, with no upfront hardware cost, and you can pick a bigger card for a demanding project. The trade-off versus a render farm is less raw parallelism for gigantic animation jobs, and the trade-off versus owning is a per-hour cost if you render nonstop.
The honest guidance: for interactive work, iteration, and moderate render jobs, a cloud GPU desktop is a superb fit. For truly massive animation renders where you just need frames back as fast as possible, a render farm may finish sooner. For constant full-time rendering, owning hardware eventually costs less. Many artists sensibly use a cloud desktop for day-to-day heavy work and reach for a farm only on the occasional giant job.
Troubleshooting
#1. The GPU doesn't appear in Blender's preferences
Make sure you launched a GPU plan. On a GPU plan the drivers are preconfigured, so the card should show under CUDA or OptiX in Preferences, then System. If it doesn't, restart the machine.
#2. The render is slow despite a GPU
Confirm the render device is set to GPU Compute, not CPU, and that OptiX or CUDA is selected. Also check the scene fits in GPU memory, since a scene that overflows will slow down.
#3. Out of memory on a complex scene
The scene needs more VRAM than the card has. Simplify where you can, reduce texture sizes, or step up to a higher GPU plan.
#4. The interface feels laggy while I work
That's your connection to the streamed desktop, not the render performance. Lower the stream resolution or move to a better network. The render itself runs at full GPU speed regardless.
Blender on Linux vs Windows: what actually changes
If you've only used Blender on Windows or Mac, running it on Ubuntu might sound like a big adjustment. In practice, it's a small one, and worth understanding since it removes the main hesitation people have about cloud rendering on Linux.
Blender itself is essentially identical across operating systems. The interface, the tools, the shortcuts, the render engines, the .blend file format, all the same. A scene you built on Windows opens and renders on Linux without conversion, and your muscle memory carries over completely. Blender is genuinely cross-platform, and the Linux version is a first-class citizen, not an afterthought.
The differences are around Blender rather than inside it. File paths look a little different, forward slashes instead of backslashes, though Blender handles this gracefully, especially with relative paths. Installing Blender uses Linux methods like a package manager or a downloaded build rather than an installer executable. And the surrounding tools, a file manager, a terminal, are Linux versions, though they do the same jobs. None of this touches how you actually model, light, or render.
For GPU rendering specifically, Linux is arguably the better environment, which is part of why studios use it. It's lean, stable, and doesn't spend resources on a heavy OS, leaving more of the machine for your render. On a cloud desktop, the one part that's usually painful on Linux, getting the NVIDIA drivers and CUDA or OptiX working, is already handled, so you skip straight to the part that's the same everywhere: opening Blender and rendering.
The honest bottom line is that if you can use Blender on Windows, you can use it on Ubuntu with almost no learning curve. Bring your .blend file and its assets, and you'll feel at home immediately, with the bonus of Linux's rendering efficiency and a preconfigured GPU.
If you want more visibility into what an autonomous workflow is doing, this guide shows how to watch your AI agent work on a cloud desktop.
The verdict
Blender and a cloud GPU are a natural fit. You get a fast NVIDIA card with drivers already working, a full Ubuntu desktop where the interface feels smooth, command-line rendering when you want to automate, and the flexibility to scale up for a big job and give the hardware back afterward. Your own machine stays free while renders run in the cloud, and you only pay for the time the GPU is actually working.
Stop tying up your laptop for an hour every render. Create a Vagon account, launch a GPU Ubuntu machine, and you'll be rendering in Cycles within a few minutes.
Frequently Asked Questions
Do I need to configure NVIDIA drivers and CUDA myself?
No. That's one of the best reasons to use a cloud GPU desktop for Blender. Drivers and CUDA are already set up, so your GPU appears in Blender's preferences and rendering works right away.
Can I use both Cycles and Eevee?
Yes. Eevee is fast and great for real-time and stylized work, Cycles is the physically-based path tracer for photorealism. Both run on the GPU. Cycles is where the cloud GPU really pays off, since it's the render-time-heavy engine.
Should I use CUDA or OptiX?
On RTX-class GPUs, OptiX is usually faster because it uses the ray-tracing hardware. Try both in your actual scene and use whichever renders quicker. Both are available on a cloud GPU desktop.
Will my project files be there next session?
Only if you add persistent storage. With it, your .blend files, textures, and asset libraries wait for you. Without it, treat each session as a fresh machine and bring your project along.
Is this good for animation, not just stills?
Yes, especially with command-line batch rendering. Queue the full frame range, let it render, and download the frames. For very large animations, factor in render time and outbound transfer, and consider rendering in chunks.
How much faster is a cloud GPU than my laptop?
It depends on your laptop and the scene, but a data-center GPU like an A10G renders Cycles scenes substantially faster than a typical laptop GPU, often turning an hour into a fraction of it. The heavier the scene, the bigger the difference.
Can I render on Linux if I built my scene on Windows or Mac?
Yes. Blender's .blend files are cross-platform, so a scene made on any OS renders on Linux. Just make sure your textures and linked assets come along, using relative paths or packing them into the file.
Does rendering in the cloud reduce quality?
No. It's the same Blender producing the same output. You're only changing where the render runs, not how it renders. A cloud GPU gives you identical quality, faster.
How do I keep the cost predictable?
Estimate render time from a few test frames, run in focused sessions, add persistent storage so setup is fast, and shut down when the render is done. The meter stops when the machine stops.
Get Beyond Your Computer Performance
Run applications on your cloud computer with the latest generation hardware. No more crashes or lags.
Trial includes 1 hour usage + 7 days of storage.
Summarize with AI

Ready to focus on your creativity?
Vagon gives you the ability to create & render projects, collaborate, and stream applications with the power of the best hardware.

Vagon Blog

Run heavy applications on any device with
your personal computer on the cloud.
San Francisco, California
Solutions
Vagon Teams
Vagon Streams
Use Cases
Resources
Vagon Blog
How to Automate Blender Tasks With GPT-6 Astra
GPT-6 Astra Blender Unreal Engine Workflow: Playable 3D
Reference Image to 3D Scene With GPT-6 Astra & Blender
What Is Application Streaming? How It Works in 2026
Best Digital Twin Platforms & Software (2026)
Best 3D Product Configurator Software in 2026
VDI Solutions Compared: How to Choose the Right VDI Solution
Citrix Pricing: License Cost and Hidden Hardware Expenses
Persistent VDI: Setup, Costs, and Trade-offs
Vagon Blog
Run heavy applications on any device with
your personal computer on the cloud.
San Francisco, California
Solutions
Vagon Teams
Vagon Streams
Use Cases
Resources
Vagon Blog
How to Automate Blender Tasks With GPT-6 Astra
GPT-6 Astra Blender Unreal Engine Workflow: Playable 3D
Reference Image to 3D Scene With GPT-6 Astra & Blender
What Is Application Streaming? How It Works in 2026
Best Digital Twin Platforms & Software (2026)
Best 3D Product Configurator Software in 2026
VDI Solutions Compared: How to Choose the Right VDI Solution
Citrix Pricing: License Cost and Hidden Hardware Expenses
Persistent VDI: Setup, Costs, and Trade-offs
Vagon Blog
Run heavy applications on any device with
your personal computer on the cloud.
San Francisco, California
Solutions
Vagon Teams
Vagon Streams
Use Cases
Resources
Vagon Blog