Instant Connection for Pixel Streaming
— New Feature Automated Setup
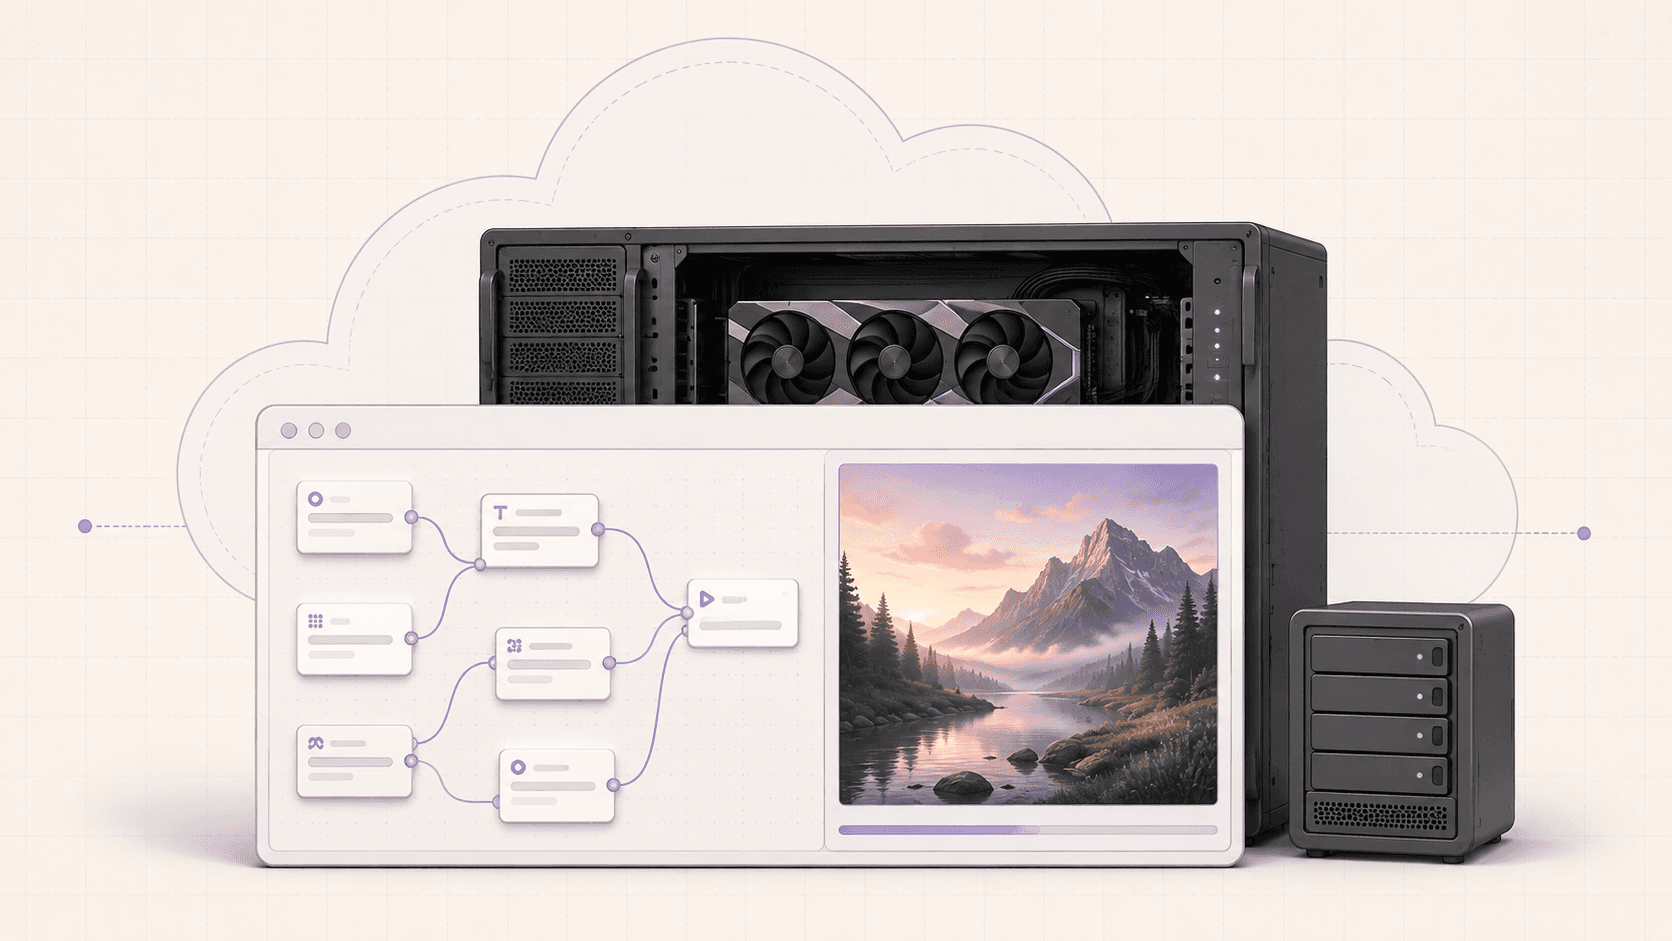
How to Run ComfyUI in the Cloud on a GPU Ubuntu Desktop (2026 Guide)
How to Run ComfyUI in the Cloud on a GPU Ubuntu Desktop (2026 Guide)
How to Run ComfyUI in the Cloud on a GPU Ubuntu Desktop (2026 Guide)
Table of Contents
Quick answer: To run ComfyUI in the cloud, launch a GPU Ubuntu desktop (for example on Vagon with an NVIDIA A10G), clone the ComfyUI repository, install its dependencies into a Python environment, add your models, and launch it in the machine's own browser. Because it's a real desktop with a preconfigured GPU, the node editor feels smooth, SDXL and Flux run without out-of-memory errors, and you pay only for the hours you generate.
Key takeaways
ComfyUI is VRAM-hungry. SDXL, Flux, and video models overwhelm most laptop GPUs, which is the core reason to run it in the cloud.
A cloud desktop suits ComfyUI better than a headless pod, because the node editor is visual and interactive and you open it in a real browser.
Drivers and CUDA are preconfigured, so you skip the setup that usually breaks on a fresh machine.
Persistent storage is essential here, since checkpoints and models are large and re-downloading them each session is painful.
It's billed by the minute, ideal for focused generation sessions and a poor fit for constant all-day use, where owning a GPU may be cheaper.
Custom nodes and dependencies are safer on a disposable VM, because you can experiment and reset without risking your real machine.
ComfyUI hands you more control over image generation than almost anything else, and it asks for more in return. The node graph is beautiful. The community workflows are incredible. And the moment you load a heavy checkpoint, add a couple of upscalers, and try to run SDXL or a video model, your laptop GPU taps out with an out-of-memory error and a whole lot of nothing.
If you've hit that wall, you already know the problem isn't ComfyUI. It's VRAM. And the cleanest fix, short of buying a several-thousand-dollar GPU that mostly sits idle, is to run ComfyUI on a cloud GPU desktop. You rent the card for the hours you need it, you generate, and you shut it down.
This guide walks through setting up ComfyUI on a cloud Ubuntu desktop, why the "desktop" part genuinely matters for this specific tool, how to manage the models and custom nodes that make ComfyUI powerful, and where a cloud machine is and isn't the right choice.
What ComfyUI Is And Why It Needs a Strong GPU
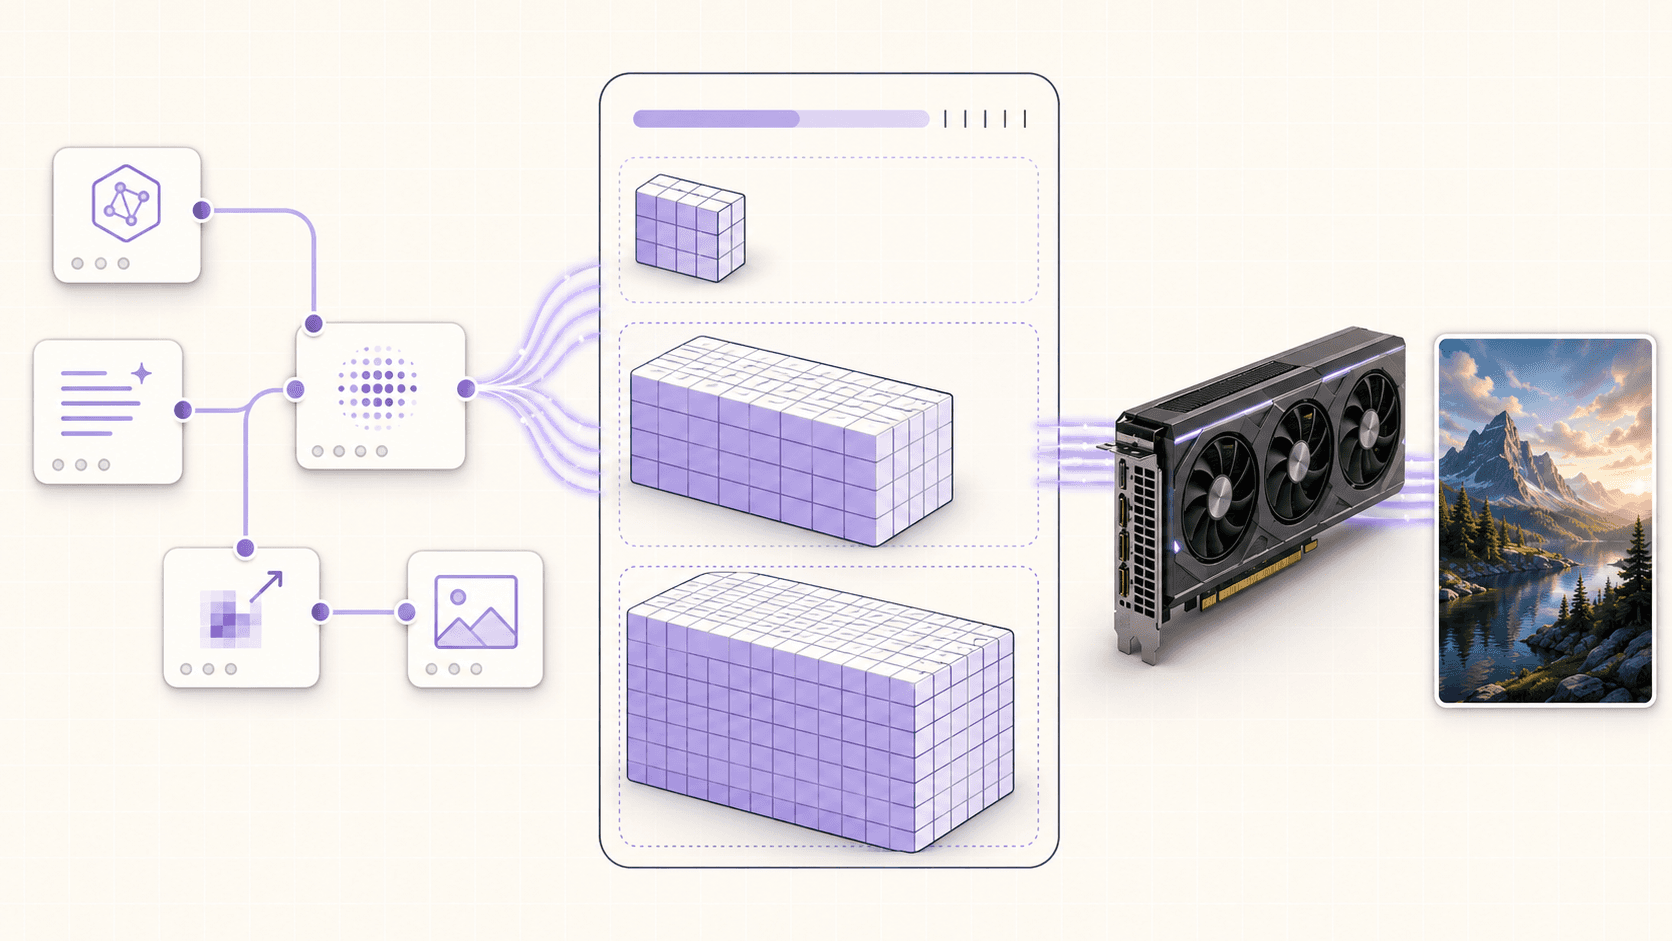
ComfyUI is a node-based interface for image and video generation models like Stable Diffusion, SDXL, and Flux. Instead of a single prompt box, you build a workflow out of connected nodes: load a checkpoint, encode a prompt, sample an image, upscale it, save it. That graph gives you enormous control, which is why it's beloved by people who want to go beyond basic generation.
That control comes with a hardware cost. Modern image models are large, and the process of generating an image, especially at high resolution or with upscaling and multiple stages, needs a lot of GPU memory. Here's roughly where the pain shows up:
Older or small models run on modest GPUs, but the results show their age.
SDXL wants a solid chunk of VRAM, more than many laptops have comfortably.
Flux and modern high-quality models are hungrier still.
Video generation models are the most demanding of all, often needing serious VRAM.
When your GPU runs out of memory, you get an out-of-memory error and the generation fails. There's no patience workaround, the memory either fits or it doesn't. That's the wall a cloud GPU knocks down.
Definition: running ComfyUI in the cloud
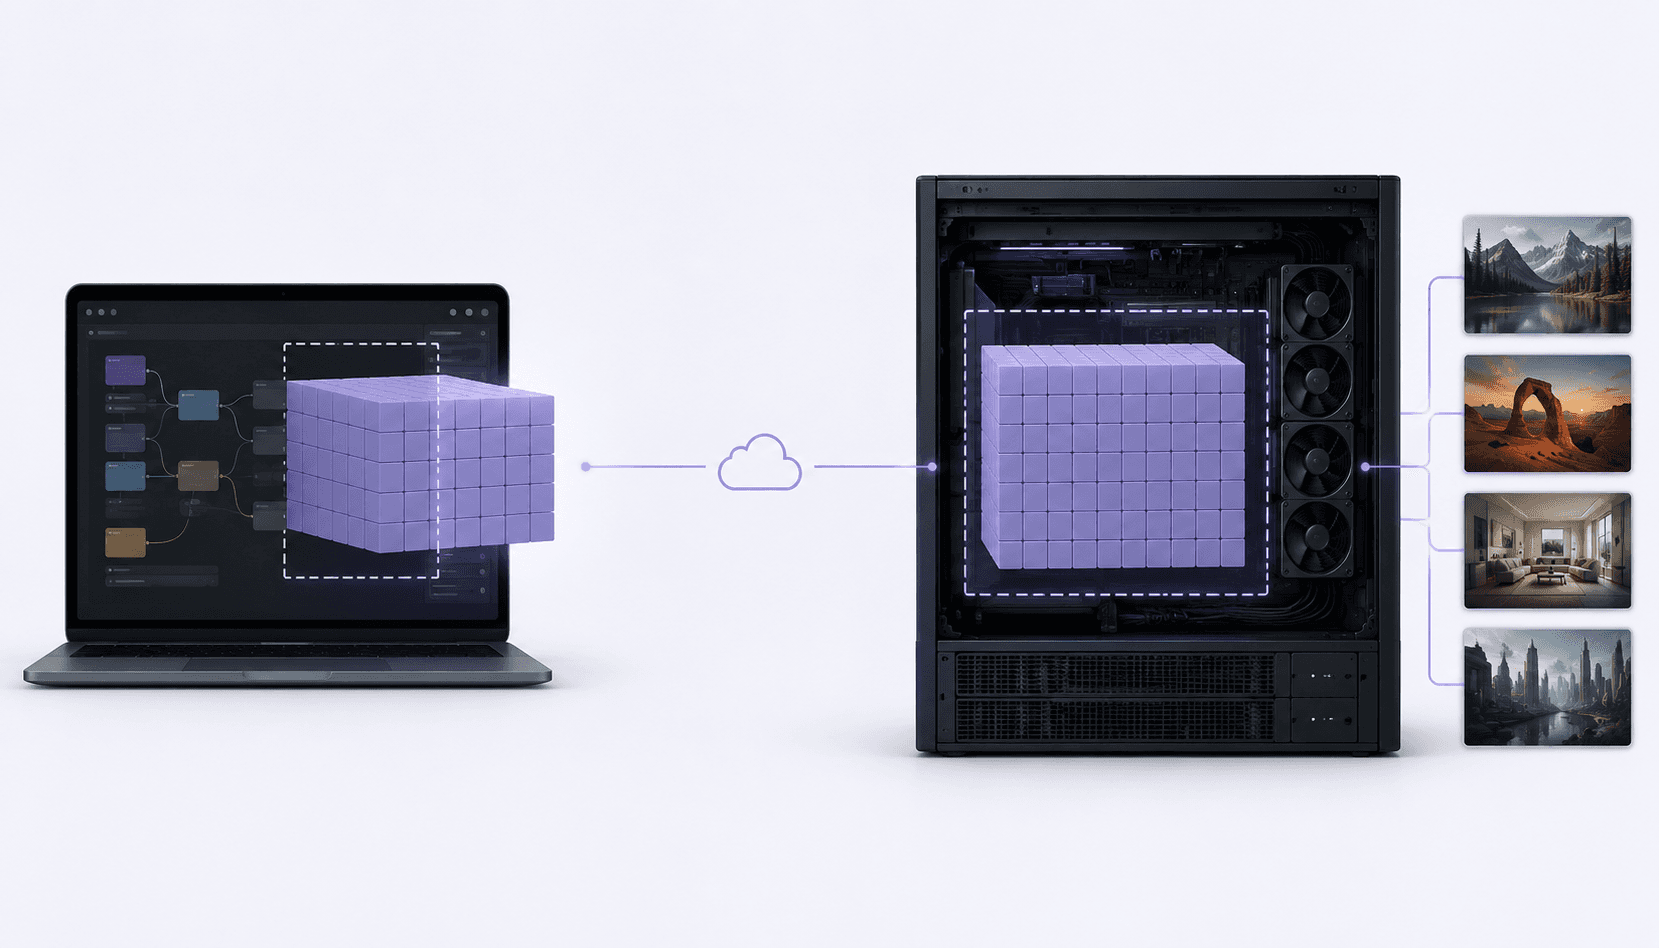
Running ComfyUI in the cloud means installing ComfyUI on a remote GPU machine, a cloud Ubuntu desktop, and generating images there instead of on your local computer. You get the VRAM and speed of a data-center GPU while keeping full control of your models, nodes, and workflows.
If you’re looking for a full Linux environment without setting up local hardware, this guide explains how to get an Ubuntu desktop in the cloud.
Why ComfyUI Belongs on a Real Desktop, Not a Headless Pod
There are plenty of ways to rent a GPU. Most of them hand you a headless server and a Jupyter tab. For a lot of ML work that's fine. For ComfyUI, a real graphical desktop is genuinely nicer, and here's why.
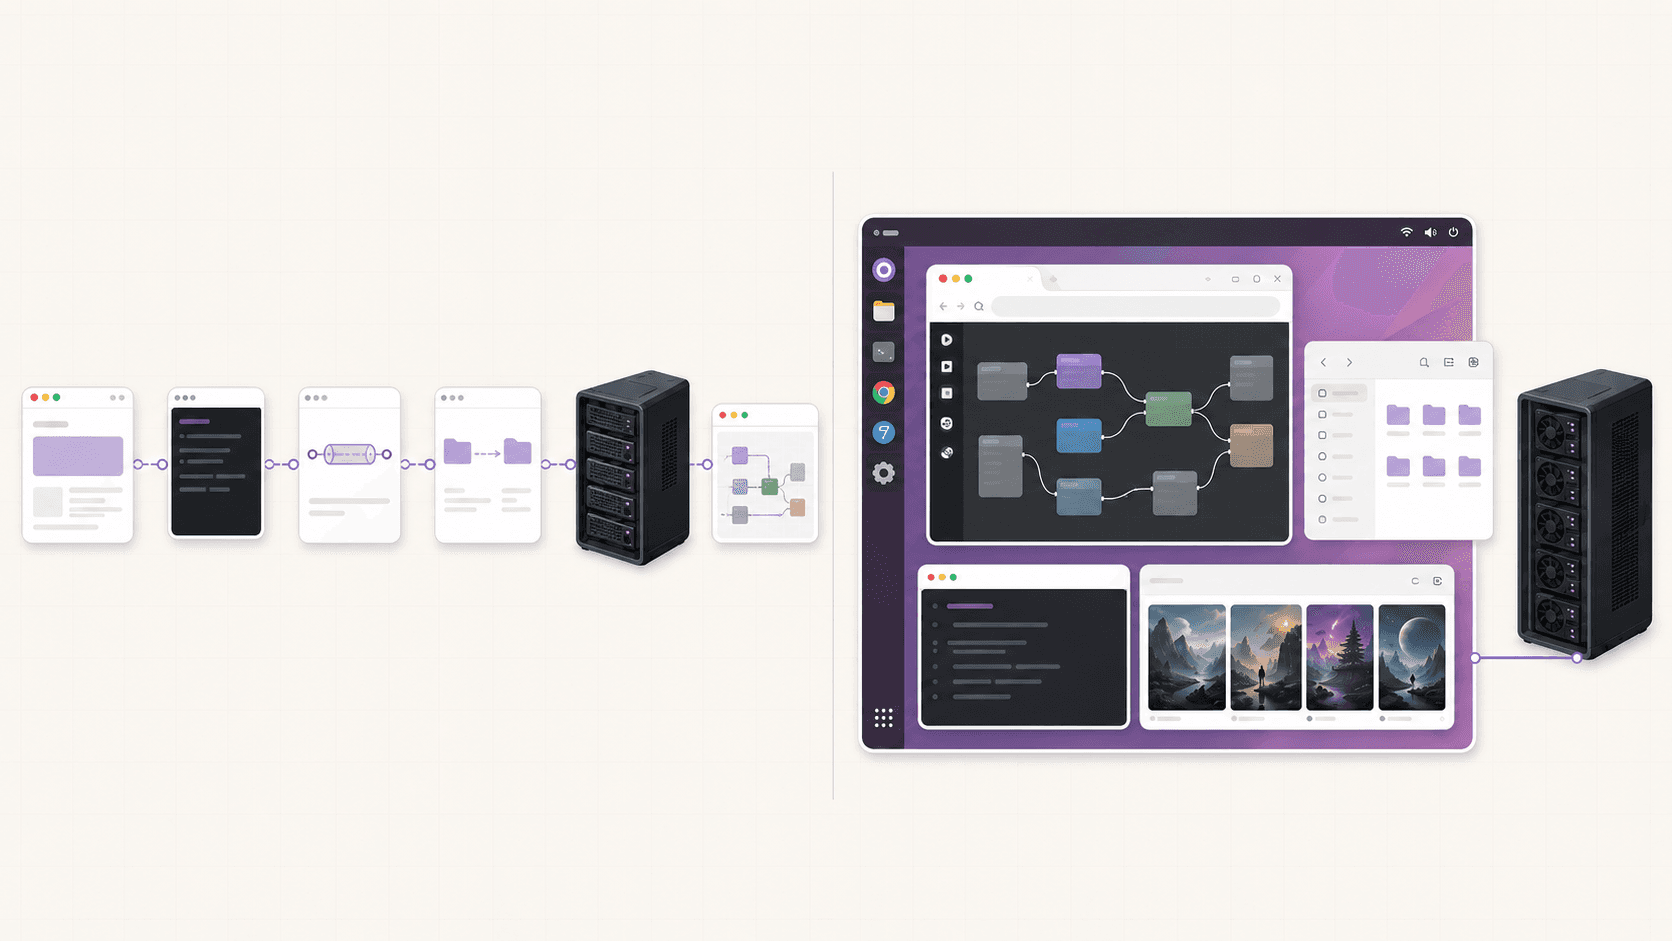
ComfyUI is a visual, interactive tool. You drag nodes, wire them together, tweak a value, and re-run. You compare outputs side by side. You're constantly looking at images. On a headless pod you'd tunnel a port and squint at a browser tab bounced through SSH, and moving models and outputs around means a series of command-line file transfers.
On a real Ubuntu desktop, you just open the machine's own browser, load ComfyUI at localhost, and work with it the way it was meant to be used: full screen, responsive, with a file manager right there to drag models and outputs around. On Vagon, that desktop streams to you at up to 4K and 60 frames per second, so the interface stays smooth even as you fling nodes around a big graph. The difference between "operating a server through a straw" and "using an app on a computer" is exactly the difference between a headless pod and a real desktop, and for a visual tool like ComfyUI that difference is the whole experience.
Your local GPU can't handle the models you want
This is the big one. If you're getting out-of-memory errors, or your generations take minutes each, a cloud card with more VRAM solves it directly. An NVIDIA T4 handles a lot, and an A10G gives you real headroom for heavier workflows and larger models.
You only need the GPU sometimes
If you generate images in bursts, a few evenings a week or the occasional big project, owning a high-end GPU is a lot of money to have it idle most of the time. Renting by the minute means you pay for the hours you actually generate.
You want a clean, disposable setup
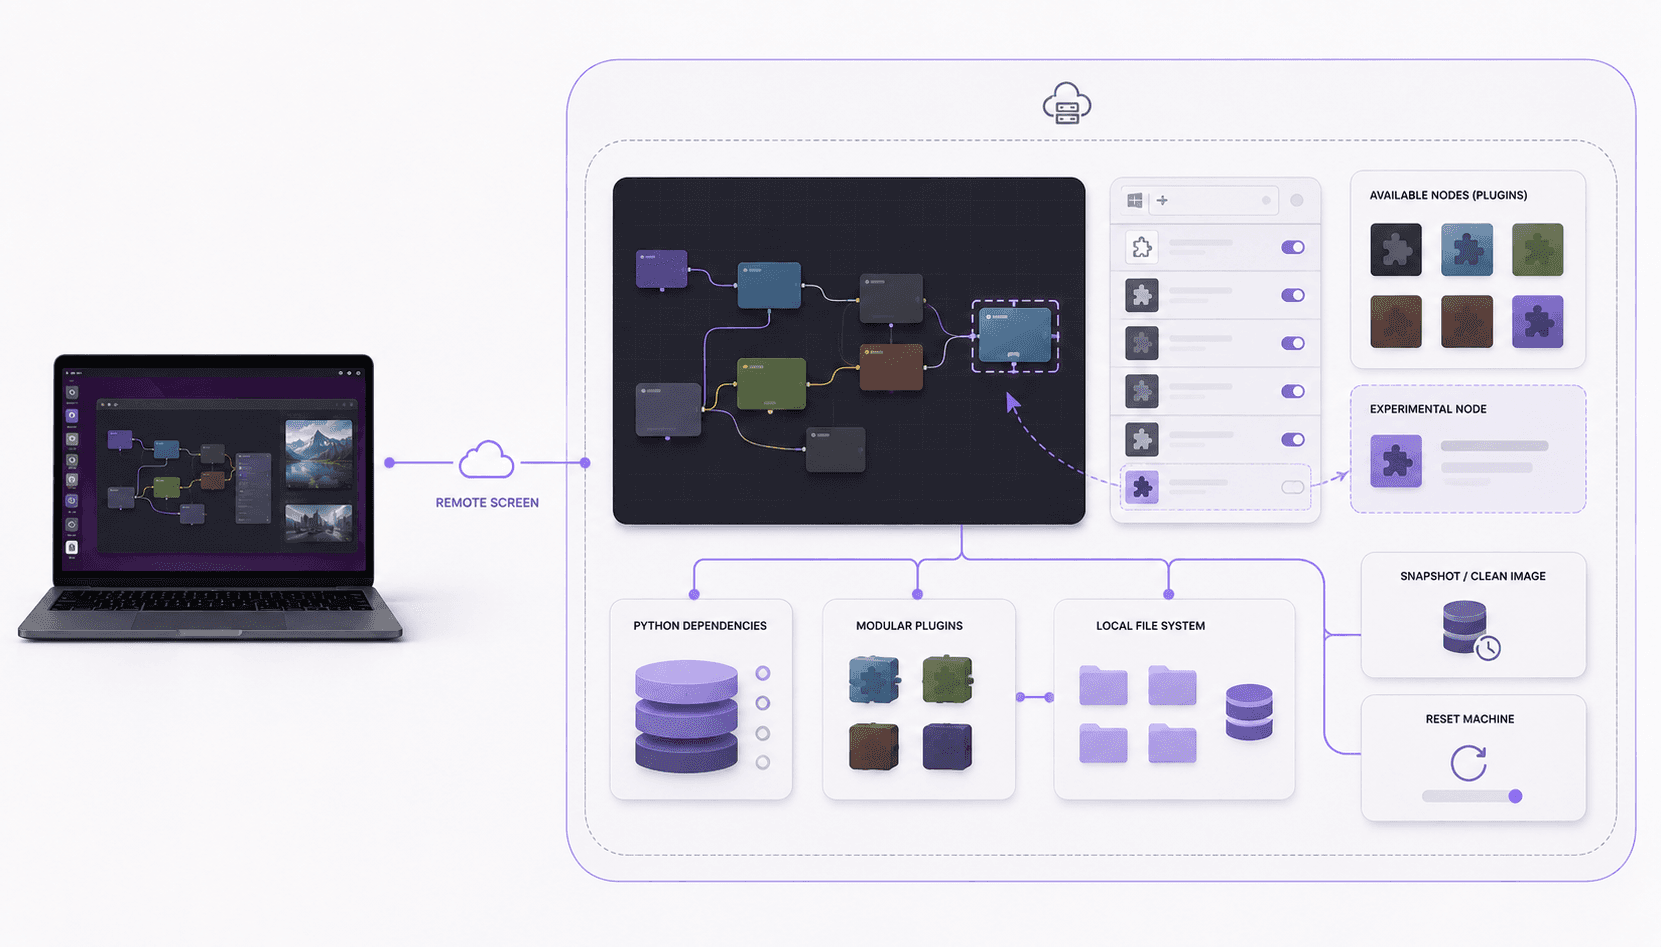
ComfyUI workflows involve a lot of custom nodes, and custom nodes involve a lot of Python dependencies that love to conflict. On an isolated cloud VM you can experiment freely, and if you wreck the environment, reset to a clean image and start over. Your real machine stays untouched.
You're on a Mac or a machine without NVIDIA
ComfyUI leans heavily on CUDA, which means NVIDIA hardware. If you're on an Apple Silicon Mac or any machine without an NVIDIA card, a cloud GPU desktop gives you the CUDA environment these workflows expect, already configured.
When to skip it
A cloud GPU desktop is billed by the minute at workstation rates. If you're generating images all day, every day, as a full-time job, at some point owning a GPU or renting a dedicated monthly machine becomes cheaper than per-minute billing. And if you only ever generate small images with a lightweight model that your laptop already handles fine, you don't need the cloud at all.
The sweet spot is clear: you want to run models bigger than your hardware allows, in focused sessions, without buying a workstation. That's exactly what this is for. Spin it up, generate, shut it down.
What You'll Need
A Vagon account with a payment method.
A GPU plan, so a machine with an NVIDIA T4 or A10G. For SDXL and most community workflows, the A10G gives comfortable headroom.
Persistent storage, strongly recommended here, because checkpoints and models are large and you don't want to re-download several gigabytes each session.
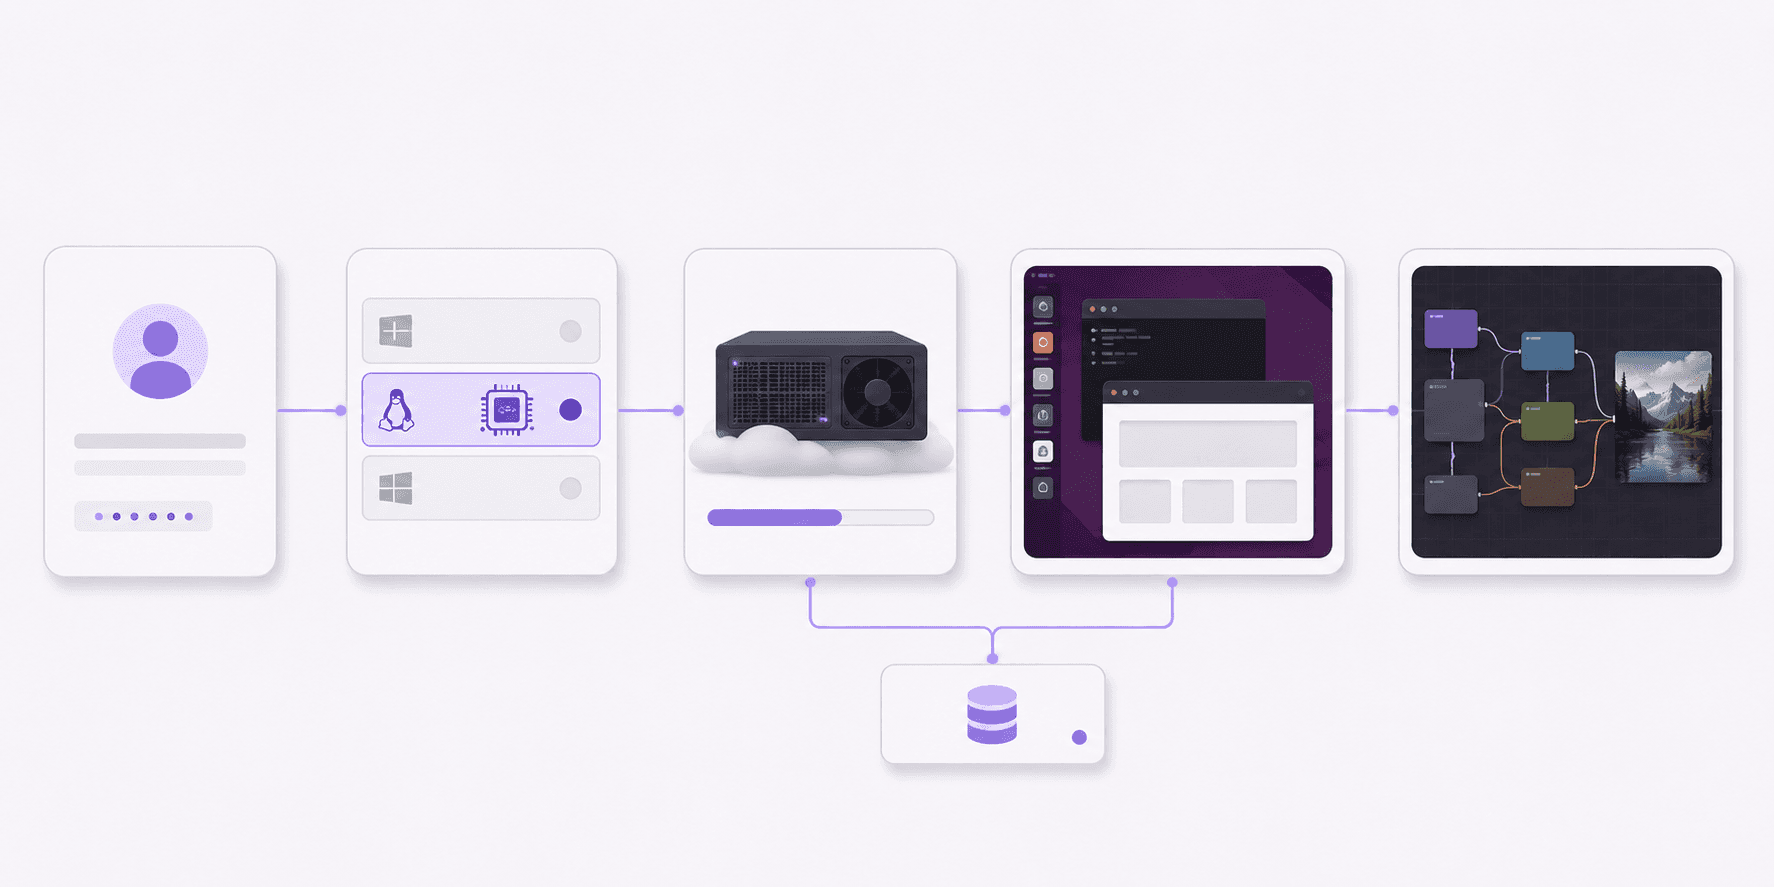
Step 1: Launch a GPU Ubuntu machine
Create a computer, choose Linux, and pick a GPU plan. For SDXL and most community workflows, an A10G gives you room to breathe. A T4 works well for lighter setups. The machine boots in about 90 seconds.
Step 2: Confirm the GPU
Open a terminal and check the card is live:
You'll see the GPU and its memory. Drivers and CUDA come preconfigured, so you skip the usual driver headache entirely.
Step 3: Install ComfyUI
Clone the repository and set up a Python environment:
Install the correct PyTorch build for the installed CUDA version if the requirements don't pull it automatically. ComfyUI's README lists the exact command, and on a cloud desktop you can just copy it and run it.
Step 4: Add your models
ComfyUI looks for checkpoints in models/checkpoints, LoRAs in models/loras, and so on. Download the models you want into those folders. On a desktop you can do this two ways, whichever you prefer:
From the terminal with
wgetorcurlstraight into the right folder.Through the browser and file manager, downloading models and dragging them into place.
If you're on persistent storage, this only has to happen once.
Step 5: Launch ComfyUI
Start the server:
Then open the machine's own browser and go to the local address it prints, usually http://127.0.0.1:8188. ComfyUI loads full screen, right there on the desktop. No tunneling, no port forwarding gymnastics.
Step 6: Generate
Load a workflow, either the default or one from the community, pick your checkpoint, write a prompt, and queue it. Watch the nodes light up as it runs. Open a system monitor or keep nvidia-smi refreshing if you want to see the VRAM fill and the GPU work.
Adding and Organizing Your Models
Model management is where ComfyUI setups get messy, so a little discipline pays off, especially with persistent storage where your library lives long-term.
ComfyUI uses a clear folder structure under models. Checkpoints, LoRAs, VAEs, embeddings, upscale models, and ControlNet models each have their own directory. Keeping your downloads sorted into the right folders means ComfyUI finds them automatically and your node dropdowns stay clean.
A few habits worth adopting:
Name files descriptively so you can tell your checkpoints apart in a dropdown months later.
Keep your most-used models in place and archive the rest, since a giant list of checkpoints slows down your workflow more than it helps.
Note where each model came from. Community models get updated, and knowing the source makes it easy to grab the latest version.
Put everything on persistent storage. Checkpoints are often 6GB or more, and LoRAs and upscalers add up fast. With persistent storage your whole library waits for you next session, and startup is quick because nothing is downloading on boot.
The payoff for good organization is that starting a new session feels like opening your own studio, with all your tools already laid out, rather than rebuilding from scratch each time.
If you’re working from a tablet, you can learn how to run Ubuntu on an iPad and access a complete Linux desktop remotely.
Managing Custom Nodes Without Breaking Things
Custom nodes are what make ComfyUI extraordinarily flexible, and also what most often break an installation. Here's how to keep them under control.
The single most useful thing to install early is the ComfyUI Manager, a custom node that makes installing and updating other community nodes far easier and helps resolve their dependencies. It turns node management from a manual chore into a few clicks, and it flags when a workflow needs nodes you don't have yet.
The reason custom nodes cause trouble is that each one can pull in its own Python packages, and those packages sometimes conflict with each other or with ComfyUI's own requirements. On your personal machine, a bad conflict can be genuinely painful to untangle. On a disposable cloud VM, it's a non-event: if an install goes sideways and your environment gets tangled, you reset the machine to a clean image and start fresh. That freedom to experiment with unfamiliar nodes, knowing a clean slate is one click away, is one of the underrated advantages of running ComfyUI on an isolated cloud desktop.
A sensible approach: install the Manager, add nodes deliberately rather than all at once, test that your workflow still runs after adding each significant one, and keep a note of which nodes a favorite workflow depends on so you can rebuild quickly if needed.
Choosing a GPU For Your Workflows
Rough guidance on matching the card to the work:
Workflow | Recommended GPU |
|---|---|
Older or small models, basic generation | T4 |
SDXL at standard resolutions | A10G |
SDXL with upscaling and multiple stages | A10G or higher |
Flux and modern high-quality models | A10G or higher |
Video generation models | Higher GPU plans |
The general rule: more VRAM means fewer out-of-memory errors and the ability to run bigger models and higher resolutions. Start on a card that comfortably fits your target model, and step up if you're hitting memory limits or want to work at larger sizes.
A Closer Look At How ComfyUI Generates an Image
Understanding the pipeline helps you reason about performance and memory, which is most of what matters when you're choosing a machine.
When you queue a generation, ComfyUI walks the node graph in order. It loads the checkpoint into GPU memory, encodes your text prompt into the form the model understands, and then runs the sampling process, the iterative denoising steps that gradually turn random noise into a coherent image. If your workflow includes a LoRA, that's applied on top of the base model. If it includes an upscaler, a second stage takes the generated image and enlarges it, often running another model in the process. A VAE then decodes the result into the final pixels you see.
Each of these stages holds things in GPU memory. The checkpoint itself is the biggest single consumer, which is why a large model like SDXL or Flux needs a card with enough VRAM just to load. On top of that, higher resolutions and larger batch sizes multiply the memory needed during sampling, and upscaling stages add their own load. When the total exceeds your card's memory, you get the out-of-memory error.
This is why the practical advice is always the same: pick a GPU that comfortably holds your target model with headroom, generate at a sensible base resolution, and treat upscaling as a separate step rather than trying to generate enormous images in one pass. On a cloud desktop, if you find yourself constantly bumping into memory limits, the fix is a one-click step up to a bigger card rather than a hardware purchase, which is exactly the flexibility that makes renting attractive for this kind of work.
If you’re experimenting with private AI models, this guide walks through how to run Ollama in the cloud.
Popular Workflow Types and What They Need
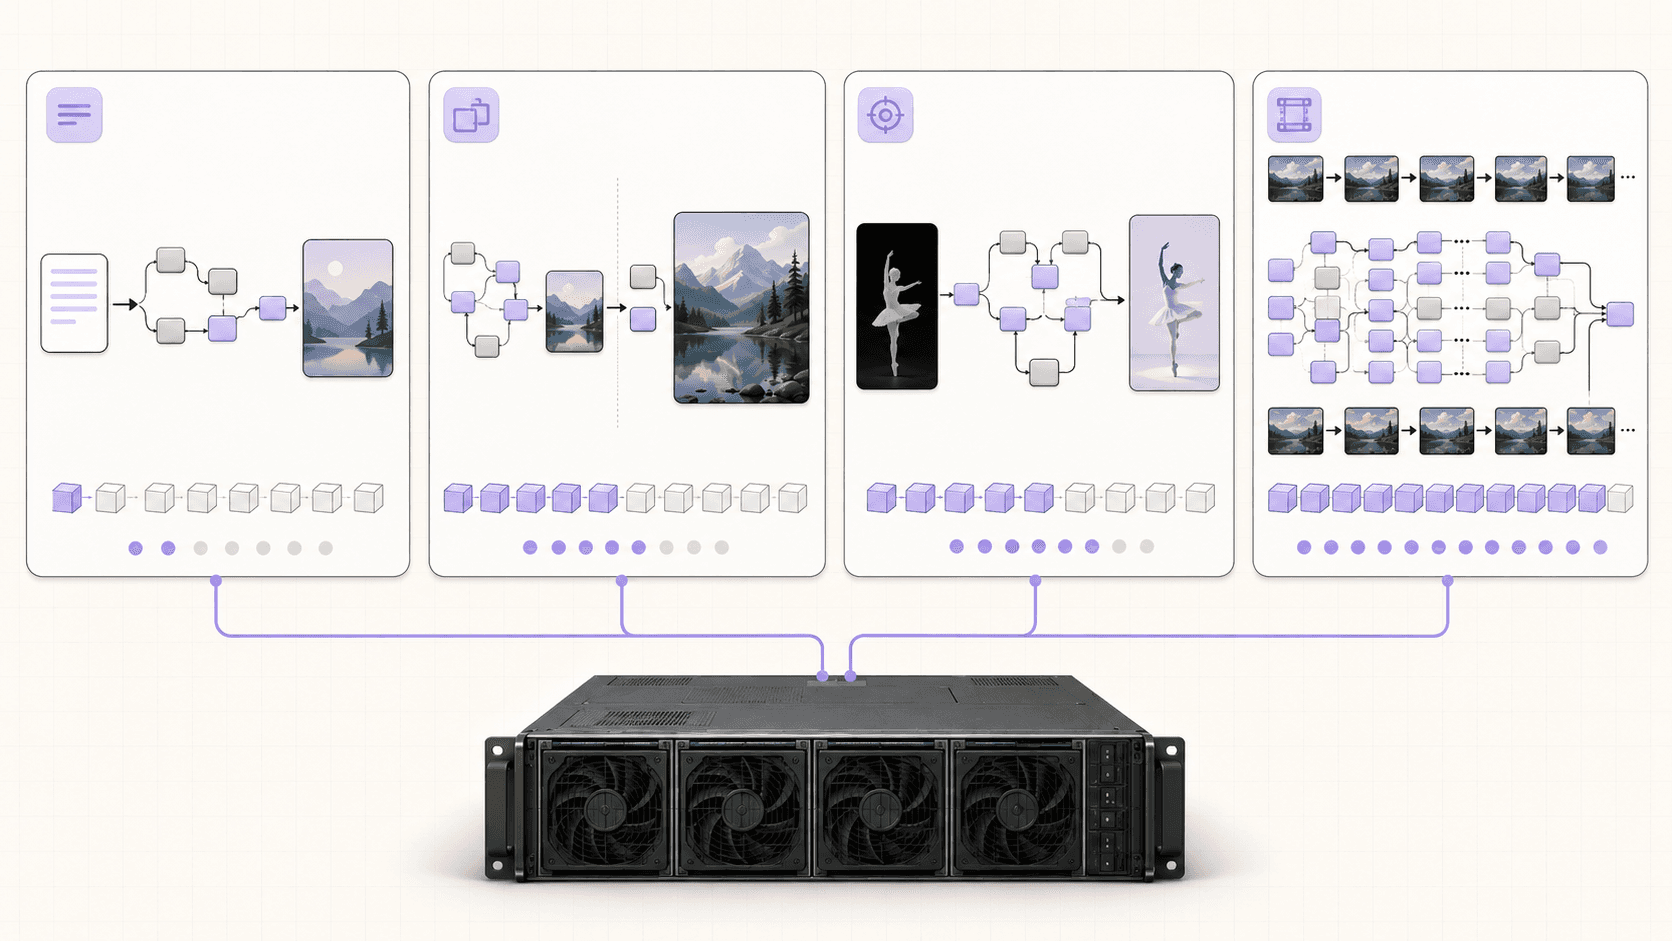
ComfyUI's community has produced an enormous range of workflows. Knowing the broad categories helps you anticipate what hardware and models a given workflow will want.
#1. Basic text-to-image
The foundation. A checkpoint, a prompt, a sampler, and a save node. These are the lightest workflows and run on modest cards, though the quality tracks the model you use.
#2. High-resolution and upscaling workflows
These generate a base image and then enlarge it through one or more upscaling stages, sometimes re-running the model at higher resolution for detail. They produce beautiful results and use meaningfully more memory and time, so they benefit from a card with headroom.
#3. LoRA and style workflows
LoRAs are small add-on models that steer a base model toward a particular style, character, or concept. They're memory-light on their own, but stacking several and combining them with a large base model adds up. These workflows are where good model organization really pays off, since you'll accumulate a lot of LoRAs.
#4. ControlNet and guided generation
ControlNet workflows let you guide generation with an input like a pose, a depth map, or an edge outline. They load an additional model alongside the checkpoint, so they want more VRAM, and they're where the control ComfyUI offers really shines.
#5. Video and animation
The most demanding category. Generating video means running models across many frames, which is heavy on both memory and time. Plan on a higher GPU plan and expect longer runs.
The common thread is that the more ambitious the workflow, the more VRAM it wants, and the more a cloud GPU with room to spare turns a frustrating series of out-of-memory errors into a smooth session.
ComfyUI vs Other Stable Diffusion Interfaces
ComfyUI isn't the only way to run these models, so it's worth knowing where it fits.
Compared to simpler interfaces built around a single prompt box and a set of sliders, ComfyUI trades ease of entry for control. The node graph has a learning curve, but it lets you build exactly the pipeline you want, reuse and share workflows, and understand precisely what each stage is doing. For people who want to go deep, that transparency and flexibility are the appeal.
Simpler web interfaces are friendlier for someone who just wants to type a prompt and get an image, and they're perfectly good for that. But they tend to hide the pipeline, which makes advanced techniques harder to compose. Many people start with a simpler tool and move to ComfyUI once they want more control, or run both for different purposes.
The good news is that a cloud Ubuntu desktop runs any of them. It's a full Linux machine with a GPU, so whether you prefer ComfyUI's node graph or a different interface, you install it and go. If you're unsure which you prefer, a cloud desktop is a low-commitment place to try both and decide.
If you’re working on demanding 3D scenes or rendering projects, this guide explains how to run Blender on a cloud GPU with Ubuntu.
Real-World Use Cases
The AI artist pushing quality. You want the best models at high resolution with upscaling, which your laptop can't handle. A cloud A10G runs your full pipeline, and you rent it for creative sessions.
The designer generating assets for a project. You need a batch of images in a consistent style for a specific job. Spin up a machine, run your workflow, generate the set, and shut down when the project's done.
The hobbyist on a Mac. ComfyUI wants NVIDIA and CUDA, which your Apple Silicon machine doesn't provide. A cloud GPU desktop gives you the environment these workflows expect.
The tinkerer exploring custom nodes. You want to try lots of community nodes and workflows without risking your main machine. A disposable VM lets you experiment freely and reset when things get messy.
The occasional creator. You generate images now and then, not daily. Owning a high-end GPU would be overkill, so renting one for the evenings you create makes far more sense.
Performance and Workflow Tips
Keep the model in VRAM. If a workflow is unexpectedly slow, check that it fits your card's memory. Overflowing to system memory tanks performance.
Use appropriate resolutions. Generating enormous images multiplies memory and time. Generate at a sensible base resolution and upscale as a separate step.
Batch your heavy jobs. If you're generating a large batch or running an expensive upscale, queue it up, let it run, and only keep the machine on as long as the work takes.
Save your favorite workflows. Export the workflows you rely on so you can reload them instantly next session, along with a note of the models and nodes they need.
Watch outbound transfer on big exports. Generating on the machine is cheap. If you're pushing a huge batch of high-resolution outputs off the machine to external storage, keep an eye on egress, where the first 10GB a month is included.
Your First Generation, Walked Through
If you're new to ComfyUI, here's what a first successful session looks like once the machine is running, so you know what to expect.
Start with the default workflow ComfyUI loads on first launch. It's a complete text-to-image pipeline: a checkpoint loader, prompt encoders for your positive and negative prompts, a sampler, and a save node, already wired together. Before you can run it, you need a checkpoint in place, so download a base model into models/checkpoints and select it in the checkpoint loader node.
Type a description of what you want into the positive prompt node, and optionally list things to avoid in the negative prompt node. Leave the sampler settings at their defaults for your first run. Then press the button to queue the prompt. You'll see the nodes highlight one by one as ComfyUI works through the graph, and after the sampling steps complete, your image appears in the save node's preview.
From there, the iterative loop begins, and it's where ComfyUI becomes addictive. Change the prompt and re-queue. Adjust the number of sampling steps. Swap the checkpoint for a different style. Add a LoRA node to steer the look. Each change is a small experiment, and because you're on a fast GPU, each generation comes back quickly enough to keep you in flow. This tight loop of tweak-and-see is exactly why the smoothness of a real desktop and the speed of a proper GPU matter so much for this tool.
Once you have a workflow you like, save it. Next session, with your models on persistent storage, you reload the workflow and you're generating within moments of the machine booting.
If you’re testing private or open-source AI models, you can also learn how to run a local LLM on Ubuntu in the cloud.
Getting The Best Image Quality
A few pointers that improve results regardless of your workflow:
The model matters most. The single biggest factor in output quality is the checkpoint you choose. Spend time finding models suited to your style rather than only tweaking settings.
Write specific prompts. Detailed, concrete descriptions generally beat vague ones. The negative prompt is a useful tool for steering away from common artifacts.
Generate then upscale. Producing a clean base image and upscaling it as a separate stage usually gives better results than trying to generate at a huge resolution directly, and it's easier on memory.
Iterate deliberately. Change one thing at a time so you learn what each adjustment does, rather than changing five settings and not knowing which helped.
None of this is specific to the cloud, but a fast cloud GPU makes the iteration loop quick enough that you actually experiment, which is how quality improves.
Cost Breakdown
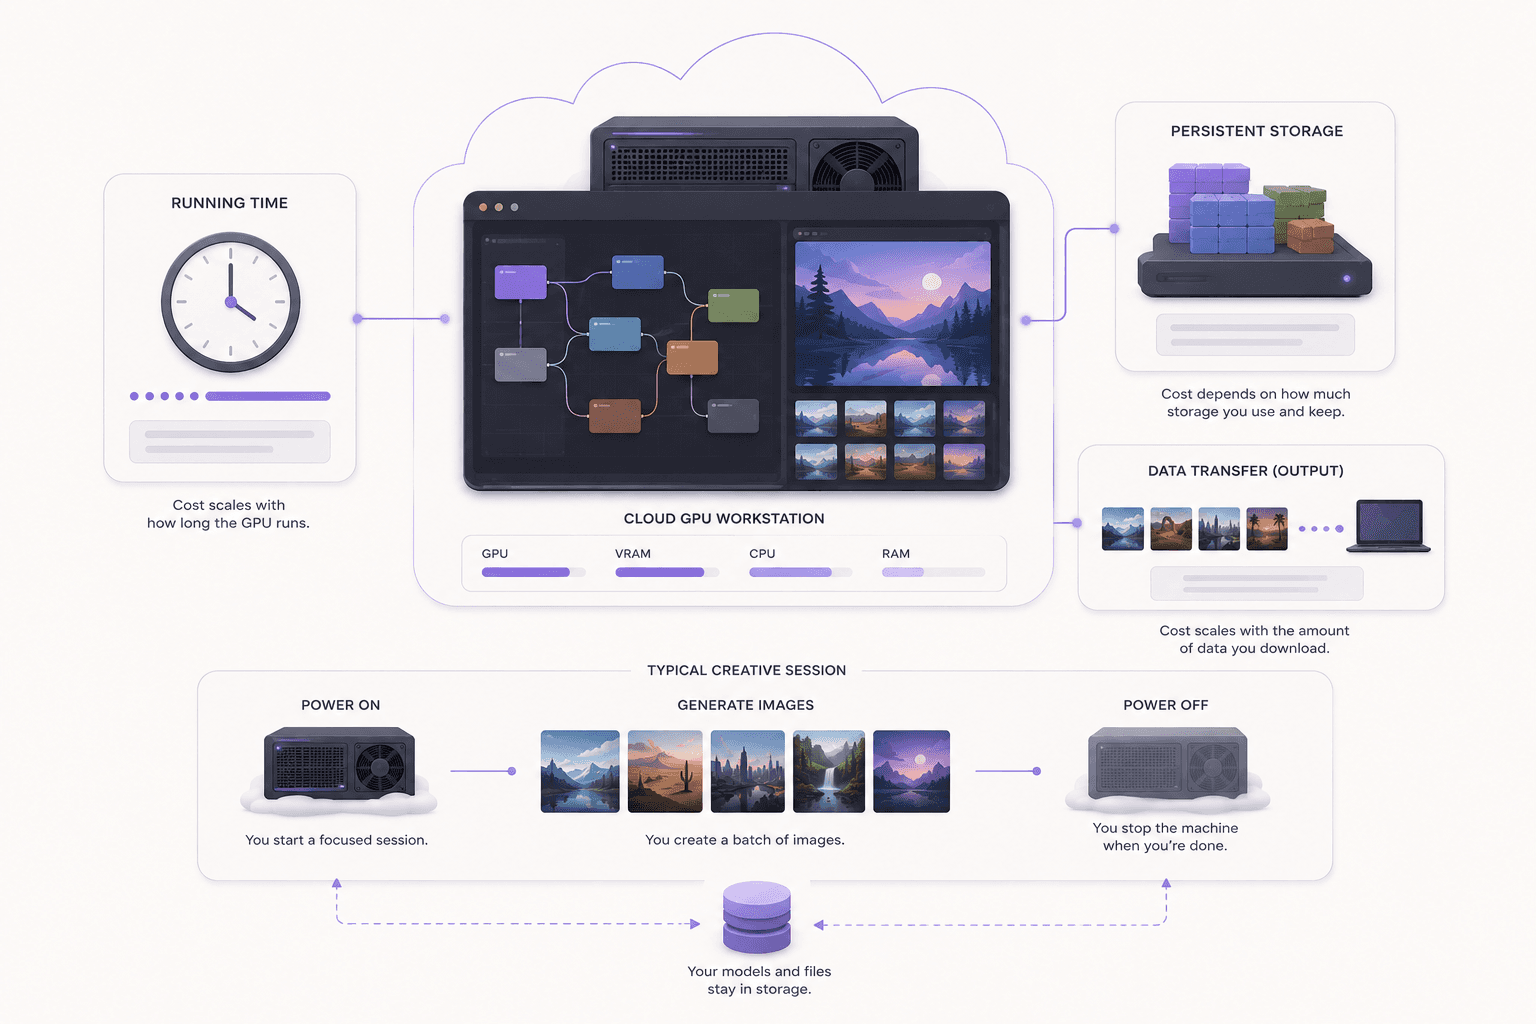
Your cost comes down to three parts: the machine's running time billed by the minute, optional persistent storage (about five dollars per 50GB per month, which is essentially mandatory for ComfyUI given model sizes), and outbound data transfer beyond the included 10GB per month, which only matters if you export large volumes.
The honest framing: for bursty generation, where you fire up the machine for an evening of creating and then stop, a per-minute cloud GPU is efficient and far cheaper than owning a high-end card. For constant, all-day generation as a full-time job, the math eventually favors owning hardware or renting a dedicated monthly machine. Use persistent storage so you're not paying for a running machine while models download, generate in focused sessions, and shut the machine down when you're done.
Troubleshooting
#1. Out-of-memory errors
The model or workflow needs more VRAM than your card has. Use a smaller model, reduce the resolution, remove memory-heavy nodes, or step up to an A10G or higher plan.
#2. ComfyUI won't start after adding a custom node
A node's dependencies likely conflict with your environment. Because you're on a disposable VM, the fastest fix is often to reset to a clean image and reinstall more carefully, or remove the offending node and reinstall its dependencies.
#3. The interface is laggy
That's usually your connection to the streamed desktop, not the GPU. Lower the stream resolution in the client or move to a better network.
#4. A workflow references nodes I don't have
Install the ComfyUI Manager, which can detect and fetch the missing nodes a workflow needs, then reload the workflow.
If you want more visibility into what an autonomous workflow is doing, this guide shows how to watch your AI agent work on a cloud desktop.
Bringing It Together
ComfyUI is at its best when it has a real GPU behind it and a real desktop in front of it. A cloud Ubuntu desktop gives you both: an NVIDIA card with the VRAM to run the models that overwhelm your laptop, CUDA already configured, and a full graphical environment where the node editor feels smooth and your files are right where you expect them. Keep your models on persistent storage, lean on the disposable VM to experiment with custom nodes freely, rent it for the sessions you need, and turn it off when you're done.
Tired of out-of-memory errors killing your generations? Create a Vagon account, launch a GPU Ubuntu machine, and you'll be wiring up nodes in a few minutes.
Frequently Asked Questions
Do I need to install NVIDIA drivers and CUDA myself?
No. A cloud GPU desktop comes with drivers and CUDA already set up. nvidia-smi works out of the box and ComfyUI finds the GPU without extra configuration.
Can I run SDXL, Flux, or video models?
Yes, that's largely the point. These are the models that overwhelm laptop GPUs. With an A10G or a higher plan you get the VRAM to run them. Very large video models may want the biggest GPU plans, so match the machine to the model.
Will my models and workflows persist between sessions?
Only if you add persistent storage, which is strongly recommended for ComfyUI given how large the models are. Your checkpoints, LoRAs, custom nodes, and saved workflows all wait for you next time.
How is this different from a hosted image-generation site?
A hosted site is simpler but limits you to their models, their nodes, and their workflows, and often charges per image. Running ComfyUI yourself gives you the full node graph, any model you want, complete control, and privacy, at the cost of setting it up. A cloud desktop makes that setup fast.
Is a cloud GPU cheaper than buying one for ComfyUI?
For bursty or occasional generation, yes, because you avoid a large upfront cost and only pay for active hours. For constant full-time generation, owning a GPU can become cheaper over time. It depends on how many hours a month you actually generate.
Can I use community workflows I find online?
Yes. Load the workflow, and if it needs custom nodes you don't have, the ComfyUI Manager can fetch them. Make sure you also have the checkpoints and LoRAs the workflow expects.
How much VRAM do I need for SDXL?
SDXL wants a solid amount of GPU memory, comfortably more than many laptops offer. An A10G handles standard SDXL workflows with headroom, which is why it's the recommended starting point for serious use.
Can I generate video with ComfyUI in the cloud?
Yes, with the right nodes and models, though video models are the most VRAM-hungry workloads, so plan on a higher GPU plan for smooth results.
How do I keep costs reasonable?
Use persistent storage so you're not paying while models download, generate in focused sessions, and shut the machine down when you're done. The meter stops when the machine stops.
Quick answer: To run ComfyUI in the cloud, launch a GPU Ubuntu desktop (for example on Vagon with an NVIDIA A10G), clone the ComfyUI repository, install its dependencies into a Python environment, add your models, and launch it in the machine's own browser. Because it's a real desktop with a preconfigured GPU, the node editor feels smooth, SDXL and Flux run without out-of-memory errors, and you pay only for the hours you generate.
Key takeaways
ComfyUI is VRAM-hungry. SDXL, Flux, and video models overwhelm most laptop GPUs, which is the core reason to run it in the cloud.
A cloud desktop suits ComfyUI better than a headless pod, because the node editor is visual and interactive and you open it in a real browser.
Drivers and CUDA are preconfigured, so you skip the setup that usually breaks on a fresh machine.
Persistent storage is essential here, since checkpoints and models are large and re-downloading them each session is painful.
It's billed by the minute, ideal for focused generation sessions and a poor fit for constant all-day use, where owning a GPU may be cheaper.
Custom nodes and dependencies are safer on a disposable VM, because you can experiment and reset without risking your real machine.
ComfyUI hands you more control over image generation than almost anything else, and it asks for more in return. The node graph is beautiful. The community workflows are incredible. And the moment you load a heavy checkpoint, add a couple of upscalers, and try to run SDXL or a video model, your laptop GPU taps out with an out-of-memory error and a whole lot of nothing.
If you've hit that wall, you already know the problem isn't ComfyUI. It's VRAM. And the cleanest fix, short of buying a several-thousand-dollar GPU that mostly sits idle, is to run ComfyUI on a cloud GPU desktop. You rent the card for the hours you need it, you generate, and you shut it down.
This guide walks through setting up ComfyUI on a cloud Ubuntu desktop, why the "desktop" part genuinely matters for this specific tool, how to manage the models and custom nodes that make ComfyUI powerful, and where a cloud machine is and isn't the right choice.
What ComfyUI Is And Why It Needs a Strong GPU
ComfyUI is a node-based interface for image and video generation models like Stable Diffusion, SDXL, and Flux. Instead of a single prompt box, you build a workflow out of connected nodes: load a checkpoint, encode a prompt, sample an image, upscale it, save it. That graph gives you enormous control, which is why it's beloved by people who want to go beyond basic generation.
That control comes with a hardware cost. Modern image models are large, and the process of generating an image, especially at high resolution or with upscaling and multiple stages, needs a lot of GPU memory. Here's roughly where the pain shows up:
Older or small models run on modest GPUs, but the results show their age.
SDXL wants a solid chunk of VRAM, more than many laptops have comfortably.
Flux and modern high-quality models are hungrier still.
Video generation models are the most demanding of all, often needing serious VRAM.
When your GPU runs out of memory, you get an out-of-memory error and the generation fails. There's no patience workaround, the memory either fits or it doesn't. That's the wall a cloud GPU knocks down.
Definition: running ComfyUI in the cloud
Running ComfyUI in the cloud means installing ComfyUI on a remote GPU machine, a cloud Ubuntu desktop, and generating images there instead of on your local computer. You get the VRAM and speed of a data-center GPU while keeping full control of your models, nodes, and workflows.
If you’re looking for a full Linux environment without setting up local hardware, this guide explains how to get an Ubuntu desktop in the cloud.
Why ComfyUI Belongs on a Real Desktop, Not a Headless Pod
There are plenty of ways to rent a GPU. Most of them hand you a headless server and a Jupyter tab. For a lot of ML work that's fine. For ComfyUI, a real graphical desktop is genuinely nicer, and here's why.
ComfyUI is a visual, interactive tool. You drag nodes, wire them together, tweak a value, and re-run. You compare outputs side by side. You're constantly looking at images. On a headless pod you'd tunnel a port and squint at a browser tab bounced through SSH, and moving models and outputs around means a series of command-line file transfers.
On a real Ubuntu desktop, you just open the machine's own browser, load ComfyUI at localhost, and work with it the way it was meant to be used: full screen, responsive, with a file manager right there to drag models and outputs around. On Vagon, that desktop streams to you at up to 4K and 60 frames per second, so the interface stays smooth even as you fling nodes around a big graph. The difference between "operating a server through a straw" and "using an app on a computer" is exactly the difference between a headless pod and a real desktop, and for a visual tool like ComfyUI that difference is the whole experience.
Your local GPU can't handle the models you want
This is the big one. If you're getting out-of-memory errors, or your generations take minutes each, a cloud card with more VRAM solves it directly. An NVIDIA T4 handles a lot, and an A10G gives you real headroom for heavier workflows and larger models.
You only need the GPU sometimes
If you generate images in bursts, a few evenings a week or the occasional big project, owning a high-end GPU is a lot of money to have it idle most of the time. Renting by the minute means you pay for the hours you actually generate.
You want a clean, disposable setup
ComfyUI workflows involve a lot of custom nodes, and custom nodes involve a lot of Python dependencies that love to conflict. On an isolated cloud VM you can experiment freely, and if you wreck the environment, reset to a clean image and start over. Your real machine stays untouched.
You're on a Mac or a machine without NVIDIA
ComfyUI leans heavily on CUDA, which means NVIDIA hardware. If you're on an Apple Silicon Mac or any machine without an NVIDIA card, a cloud GPU desktop gives you the CUDA environment these workflows expect, already configured.
When to skip it
A cloud GPU desktop is billed by the minute at workstation rates. If you're generating images all day, every day, as a full-time job, at some point owning a GPU or renting a dedicated monthly machine becomes cheaper than per-minute billing. And if you only ever generate small images with a lightweight model that your laptop already handles fine, you don't need the cloud at all.
The sweet spot is clear: you want to run models bigger than your hardware allows, in focused sessions, without buying a workstation. That's exactly what this is for. Spin it up, generate, shut it down.
What You'll Need
A Vagon account with a payment method.
A GPU plan, so a machine with an NVIDIA T4 or A10G. For SDXL and most community workflows, the A10G gives comfortable headroom.
Persistent storage, strongly recommended here, because checkpoints and models are large and you don't want to re-download several gigabytes each session.
Step 1: Launch a GPU Ubuntu machine
Create a computer, choose Linux, and pick a GPU plan. For SDXL and most community workflows, an A10G gives you room to breathe. A T4 works well for lighter setups. The machine boots in about 90 seconds.
Step 2: Confirm the GPU
Open a terminal and check the card is live:
You'll see the GPU and its memory. Drivers and CUDA come preconfigured, so you skip the usual driver headache entirely.
Step 3: Install ComfyUI
Clone the repository and set up a Python environment:
Install the correct PyTorch build for the installed CUDA version if the requirements don't pull it automatically. ComfyUI's README lists the exact command, and on a cloud desktop you can just copy it and run it.
Step 4: Add your models
ComfyUI looks for checkpoints in models/checkpoints, LoRAs in models/loras, and so on. Download the models you want into those folders. On a desktop you can do this two ways, whichever you prefer:
From the terminal with
wgetorcurlstraight into the right folder.Through the browser and file manager, downloading models and dragging them into place.
If you're on persistent storage, this only has to happen once.
Step 5: Launch ComfyUI
Start the server:
Then open the machine's own browser and go to the local address it prints, usually http://127.0.0.1:8188. ComfyUI loads full screen, right there on the desktop. No tunneling, no port forwarding gymnastics.
Step 6: Generate
Load a workflow, either the default or one from the community, pick your checkpoint, write a prompt, and queue it. Watch the nodes light up as it runs. Open a system monitor or keep nvidia-smi refreshing if you want to see the VRAM fill and the GPU work.
Adding and Organizing Your Models
Model management is where ComfyUI setups get messy, so a little discipline pays off, especially with persistent storage where your library lives long-term.
ComfyUI uses a clear folder structure under models. Checkpoints, LoRAs, VAEs, embeddings, upscale models, and ControlNet models each have their own directory. Keeping your downloads sorted into the right folders means ComfyUI finds them automatically and your node dropdowns stay clean.
A few habits worth adopting:
Name files descriptively so you can tell your checkpoints apart in a dropdown months later.
Keep your most-used models in place and archive the rest, since a giant list of checkpoints slows down your workflow more than it helps.
Note where each model came from. Community models get updated, and knowing the source makes it easy to grab the latest version.
Put everything on persistent storage. Checkpoints are often 6GB or more, and LoRAs and upscalers add up fast. With persistent storage your whole library waits for you next session, and startup is quick because nothing is downloading on boot.
The payoff for good organization is that starting a new session feels like opening your own studio, with all your tools already laid out, rather than rebuilding from scratch each time.
If you’re working from a tablet, you can learn how to run Ubuntu on an iPad and access a complete Linux desktop remotely.
Managing Custom Nodes Without Breaking Things
Custom nodes are what make ComfyUI extraordinarily flexible, and also what most often break an installation. Here's how to keep them under control.
The single most useful thing to install early is the ComfyUI Manager, a custom node that makes installing and updating other community nodes far easier and helps resolve their dependencies. It turns node management from a manual chore into a few clicks, and it flags when a workflow needs nodes you don't have yet.
The reason custom nodes cause trouble is that each one can pull in its own Python packages, and those packages sometimes conflict with each other or with ComfyUI's own requirements. On your personal machine, a bad conflict can be genuinely painful to untangle. On a disposable cloud VM, it's a non-event: if an install goes sideways and your environment gets tangled, you reset the machine to a clean image and start fresh. That freedom to experiment with unfamiliar nodes, knowing a clean slate is one click away, is one of the underrated advantages of running ComfyUI on an isolated cloud desktop.
A sensible approach: install the Manager, add nodes deliberately rather than all at once, test that your workflow still runs after adding each significant one, and keep a note of which nodes a favorite workflow depends on so you can rebuild quickly if needed.
Choosing a GPU For Your Workflows
Rough guidance on matching the card to the work:
Workflow | Recommended GPU |
|---|---|
Older or small models, basic generation | T4 |
SDXL at standard resolutions | A10G |
SDXL with upscaling and multiple stages | A10G or higher |
Flux and modern high-quality models | A10G or higher |
Video generation models | Higher GPU plans |
The general rule: more VRAM means fewer out-of-memory errors and the ability to run bigger models and higher resolutions. Start on a card that comfortably fits your target model, and step up if you're hitting memory limits or want to work at larger sizes.
A Closer Look At How ComfyUI Generates an Image
Understanding the pipeline helps you reason about performance and memory, which is most of what matters when you're choosing a machine.
When you queue a generation, ComfyUI walks the node graph in order. It loads the checkpoint into GPU memory, encodes your text prompt into the form the model understands, and then runs the sampling process, the iterative denoising steps that gradually turn random noise into a coherent image. If your workflow includes a LoRA, that's applied on top of the base model. If it includes an upscaler, a second stage takes the generated image and enlarges it, often running another model in the process. A VAE then decodes the result into the final pixels you see.
Each of these stages holds things in GPU memory. The checkpoint itself is the biggest single consumer, which is why a large model like SDXL or Flux needs a card with enough VRAM just to load. On top of that, higher resolutions and larger batch sizes multiply the memory needed during sampling, and upscaling stages add their own load. When the total exceeds your card's memory, you get the out-of-memory error.
This is why the practical advice is always the same: pick a GPU that comfortably holds your target model with headroom, generate at a sensible base resolution, and treat upscaling as a separate step rather than trying to generate enormous images in one pass. On a cloud desktop, if you find yourself constantly bumping into memory limits, the fix is a one-click step up to a bigger card rather than a hardware purchase, which is exactly the flexibility that makes renting attractive for this kind of work.
If you’re experimenting with private AI models, this guide walks through how to run Ollama in the cloud.
Popular Workflow Types and What They Need
ComfyUI's community has produced an enormous range of workflows. Knowing the broad categories helps you anticipate what hardware and models a given workflow will want.
#1. Basic text-to-image
The foundation. A checkpoint, a prompt, a sampler, and a save node. These are the lightest workflows and run on modest cards, though the quality tracks the model you use.
#2. High-resolution and upscaling workflows
These generate a base image and then enlarge it through one or more upscaling stages, sometimes re-running the model at higher resolution for detail. They produce beautiful results and use meaningfully more memory and time, so they benefit from a card with headroom.
#3. LoRA and style workflows
LoRAs are small add-on models that steer a base model toward a particular style, character, or concept. They're memory-light on their own, but stacking several and combining them with a large base model adds up. These workflows are where good model organization really pays off, since you'll accumulate a lot of LoRAs.
#4. ControlNet and guided generation
ControlNet workflows let you guide generation with an input like a pose, a depth map, or an edge outline. They load an additional model alongside the checkpoint, so they want more VRAM, and they're where the control ComfyUI offers really shines.
#5. Video and animation
The most demanding category. Generating video means running models across many frames, which is heavy on both memory and time. Plan on a higher GPU plan and expect longer runs.
The common thread is that the more ambitious the workflow, the more VRAM it wants, and the more a cloud GPU with room to spare turns a frustrating series of out-of-memory errors into a smooth session.
ComfyUI vs Other Stable Diffusion Interfaces
ComfyUI isn't the only way to run these models, so it's worth knowing where it fits.
Compared to simpler interfaces built around a single prompt box and a set of sliders, ComfyUI trades ease of entry for control. The node graph has a learning curve, but it lets you build exactly the pipeline you want, reuse and share workflows, and understand precisely what each stage is doing. For people who want to go deep, that transparency and flexibility are the appeal.
Simpler web interfaces are friendlier for someone who just wants to type a prompt and get an image, and they're perfectly good for that. But they tend to hide the pipeline, which makes advanced techniques harder to compose. Many people start with a simpler tool and move to ComfyUI once they want more control, or run both for different purposes.
The good news is that a cloud Ubuntu desktop runs any of them. It's a full Linux machine with a GPU, so whether you prefer ComfyUI's node graph or a different interface, you install it and go. If you're unsure which you prefer, a cloud desktop is a low-commitment place to try both and decide.
If you’re working on demanding 3D scenes or rendering projects, this guide explains how to run Blender on a cloud GPU with Ubuntu.
Real-World Use Cases
The AI artist pushing quality. You want the best models at high resolution with upscaling, which your laptop can't handle. A cloud A10G runs your full pipeline, and you rent it for creative sessions.
The designer generating assets for a project. You need a batch of images in a consistent style for a specific job. Spin up a machine, run your workflow, generate the set, and shut down when the project's done.
The hobbyist on a Mac. ComfyUI wants NVIDIA and CUDA, which your Apple Silicon machine doesn't provide. A cloud GPU desktop gives you the environment these workflows expect.
The tinkerer exploring custom nodes. You want to try lots of community nodes and workflows without risking your main machine. A disposable VM lets you experiment freely and reset when things get messy.
The occasional creator. You generate images now and then, not daily. Owning a high-end GPU would be overkill, so renting one for the evenings you create makes far more sense.
Performance and Workflow Tips
Keep the model in VRAM. If a workflow is unexpectedly slow, check that it fits your card's memory. Overflowing to system memory tanks performance.
Use appropriate resolutions. Generating enormous images multiplies memory and time. Generate at a sensible base resolution and upscale as a separate step.
Batch your heavy jobs. If you're generating a large batch or running an expensive upscale, queue it up, let it run, and only keep the machine on as long as the work takes.
Save your favorite workflows. Export the workflows you rely on so you can reload them instantly next session, along with a note of the models and nodes they need.
Watch outbound transfer on big exports. Generating on the machine is cheap. If you're pushing a huge batch of high-resolution outputs off the machine to external storage, keep an eye on egress, where the first 10GB a month is included.
Your First Generation, Walked Through
If you're new to ComfyUI, here's what a first successful session looks like once the machine is running, so you know what to expect.
Start with the default workflow ComfyUI loads on first launch. It's a complete text-to-image pipeline: a checkpoint loader, prompt encoders for your positive and negative prompts, a sampler, and a save node, already wired together. Before you can run it, you need a checkpoint in place, so download a base model into models/checkpoints and select it in the checkpoint loader node.
Type a description of what you want into the positive prompt node, and optionally list things to avoid in the negative prompt node. Leave the sampler settings at their defaults for your first run. Then press the button to queue the prompt. You'll see the nodes highlight one by one as ComfyUI works through the graph, and after the sampling steps complete, your image appears in the save node's preview.
From there, the iterative loop begins, and it's where ComfyUI becomes addictive. Change the prompt and re-queue. Adjust the number of sampling steps. Swap the checkpoint for a different style. Add a LoRA node to steer the look. Each change is a small experiment, and because you're on a fast GPU, each generation comes back quickly enough to keep you in flow. This tight loop of tweak-and-see is exactly why the smoothness of a real desktop and the speed of a proper GPU matter so much for this tool.
Once you have a workflow you like, save it. Next session, with your models on persistent storage, you reload the workflow and you're generating within moments of the machine booting.
If you’re testing private or open-source AI models, you can also learn how to run a local LLM on Ubuntu in the cloud.
Getting The Best Image Quality
A few pointers that improve results regardless of your workflow:
The model matters most. The single biggest factor in output quality is the checkpoint you choose. Spend time finding models suited to your style rather than only tweaking settings.
Write specific prompts. Detailed, concrete descriptions generally beat vague ones. The negative prompt is a useful tool for steering away from common artifacts.
Generate then upscale. Producing a clean base image and upscaling it as a separate stage usually gives better results than trying to generate at a huge resolution directly, and it's easier on memory.
Iterate deliberately. Change one thing at a time so you learn what each adjustment does, rather than changing five settings and not knowing which helped.
None of this is specific to the cloud, but a fast cloud GPU makes the iteration loop quick enough that you actually experiment, which is how quality improves.
Cost Breakdown
Your cost comes down to three parts: the machine's running time billed by the minute, optional persistent storage (about five dollars per 50GB per month, which is essentially mandatory for ComfyUI given model sizes), and outbound data transfer beyond the included 10GB per month, which only matters if you export large volumes.
The honest framing: for bursty generation, where you fire up the machine for an evening of creating and then stop, a per-minute cloud GPU is efficient and far cheaper than owning a high-end card. For constant, all-day generation as a full-time job, the math eventually favors owning hardware or renting a dedicated monthly machine. Use persistent storage so you're not paying for a running machine while models download, generate in focused sessions, and shut the machine down when you're done.
Troubleshooting
#1. Out-of-memory errors
The model or workflow needs more VRAM than your card has. Use a smaller model, reduce the resolution, remove memory-heavy nodes, or step up to an A10G or higher plan.
#2. ComfyUI won't start after adding a custom node
A node's dependencies likely conflict with your environment. Because you're on a disposable VM, the fastest fix is often to reset to a clean image and reinstall more carefully, or remove the offending node and reinstall its dependencies.
#3. The interface is laggy
That's usually your connection to the streamed desktop, not the GPU. Lower the stream resolution in the client or move to a better network.
#4. A workflow references nodes I don't have
Install the ComfyUI Manager, which can detect and fetch the missing nodes a workflow needs, then reload the workflow.
If you want more visibility into what an autonomous workflow is doing, this guide shows how to watch your AI agent work on a cloud desktop.
Bringing It Together
ComfyUI is at its best when it has a real GPU behind it and a real desktop in front of it. A cloud Ubuntu desktop gives you both: an NVIDIA card with the VRAM to run the models that overwhelm your laptop, CUDA already configured, and a full graphical environment where the node editor feels smooth and your files are right where you expect them. Keep your models on persistent storage, lean on the disposable VM to experiment with custom nodes freely, rent it for the sessions you need, and turn it off when you're done.
Tired of out-of-memory errors killing your generations? Create a Vagon account, launch a GPU Ubuntu machine, and you'll be wiring up nodes in a few minutes.
Frequently Asked Questions
Do I need to install NVIDIA drivers and CUDA myself?
No. A cloud GPU desktop comes with drivers and CUDA already set up. nvidia-smi works out of the box and ComfyUI finds the GPU without extra configuration.
Can I run SDXL, Flux, or video models?
Yes, that's largely the point. These are the models that overwhelm laptop GPUs. With an A10G or a higher plan you get the VRAM to run them. Very large video models may want the biggest GPU plans, so match the machine to the model.
Will my models and workflows persist between sessions?
Only if you add persistent storage, which is strongly recommended for ComfyUI given how large the models are. Your checkpoints, LoRAs, custom nodes, and saved workflows all wait for you next time.
How is this different from a hosted image-generation site?
A hosted site is simpler but limits you to their models, their nodes, and their workflows, and often charges per image. Running ComfyUI yourself gives you the full node graph, any model you want, complete control, and privacy, at the cost of setting it up. A cloud desktop makes that setup fast.
Is a cloud GPU cheaper than buying one for ComfyUI?
For bursty or occasional generation, yes, because you avoid a large upfront cost and only pay for active hours. For constant full-time generation, owning a GPU can become cheaper over time. It depends on how many hours a month you actually generate.
Can I use community workflows I find online?
Yes. Load the workflow, and if it needs custom nodes you don't have, the ComfyUI Manager can fetch them. Make sure you also have the checkpoints and LoRAs the workflow expects.
How much VRAM do I need for SDXL?
SDXL wants a solid amount of GPU memory, comfortably more than many laptops offer. An A10G handles standard SDXL workflows with headroom, which is why it's the recommended starting point for serious use.
Can I generate video with ComfyUI in the cloud?
Yes, with the right nodes and models, though video models are the most VRAM-hungry workloads, so plan on a higher GPU plan for smooth results.
How do I keep costs reasonable?
Use persistent storage so you're not paying while models download, generate in focused sessions, and shut the machine down when you're done. The meter stops when the machine stops.
Get Beyond Your Computer Performance
Run applications on your cloud computer with the latest generation hardware. No more crashes or lags.
Trial includes 1 hour usage + 7 days of storage.
Summarize with AI

Ready to focus on your creativity?
Vagon gives you the ability to create & render projects, collaborate, and stream applications with the power of the best hardware.

Vagon Blog

Run heavy applications on any device with
your personal computer on the cloud.
San Francisco, California
Solutions
Vagon Teams
Vagon Streams
Use Cases
Resources
Vagon Blog
How to Automate Blender Tasks With GPT-6 Astra
GPT-6 Astra Blender Unreal Engine Workflow: Playable 3D
Reference Image to 3D Scene With GPT-6 Astra & Blender
What Is Application Streaming? How It Works in 2026
Best Digital Twin Platforms & Software (2026)
Best 3D Product Configurator Software in 2026
VDI Solutions Compared: How to Choose the Right VDI Solution
Citrix Pricing: License Cost and Hidden Hardware Expenses
Persistent VDI: Setup, Costs, and Trade-offs
Vagon Blog
Run heavy applications on any device with
your personal computer on the cloud.
San Francisco, California
Solutions
Vagon Teams
Vagon Streams
Use Cases
Resources
Vagon Blog
How to Automate Blender Tasks With GPT-6 Astra
GPT-6 Astra Blender Unreal Engine Workflow: Playable 3D
Reference Image to 3D Scene With GPT-6 Astra & Blender
What Is Application Streaming? How It Works in 2026
Best Digital Twin Platforms & Software (2026)
Best 3D Product Configurator Software in 2026
VDI Solutions Compared: How to Choose the Right VDI Solution
Citrix Pricing: License Cost and Hidden Hardware Expenses
Persistent VDI: Setup, Costs, and Trade-offs
Vagon Blog
Run heavy applications on any device with
your personal computer on the cloud.
San Francisco, California
Solutions
Vagon Teams
Vagon Streams
Use Cases
Resources
Vagon Blog